Create External Store
To create a new store in an AxoLake or a self-managed Clickhouse instance, complete the following steps. (For details on deploying AxoLake or an appropriate self-managed Clickhouse instance, contact our support team.)
- AxoStore stores logs locally on the AxoRouter that processed the messages.
- External stores use a separately deployed AxoLake or an existing compatible ClickHouse cluster.
Prerequisites
-
You must have an AxoLake or a self-managed Clickhouse instance available.
-
You’ll need user credentials (username and password) to authenticate to the database. The account must have:
INSERTprivileges for the database where you’re creating the store to send data, andSELECTprivileges to access the data from the Search Logs page.
-
Your AxoRouter instances must be able to access the database on the network level.
Steps
To create a new store in an AxoLake, complete the following steps.
-
Navigate to Routers > Stores > Add Store.
-
Enter a Name for the store. his name will appear in the list of destinations (with the
-storesuffix) when setting the destination of a Flow. You cannot modify the name of the store later.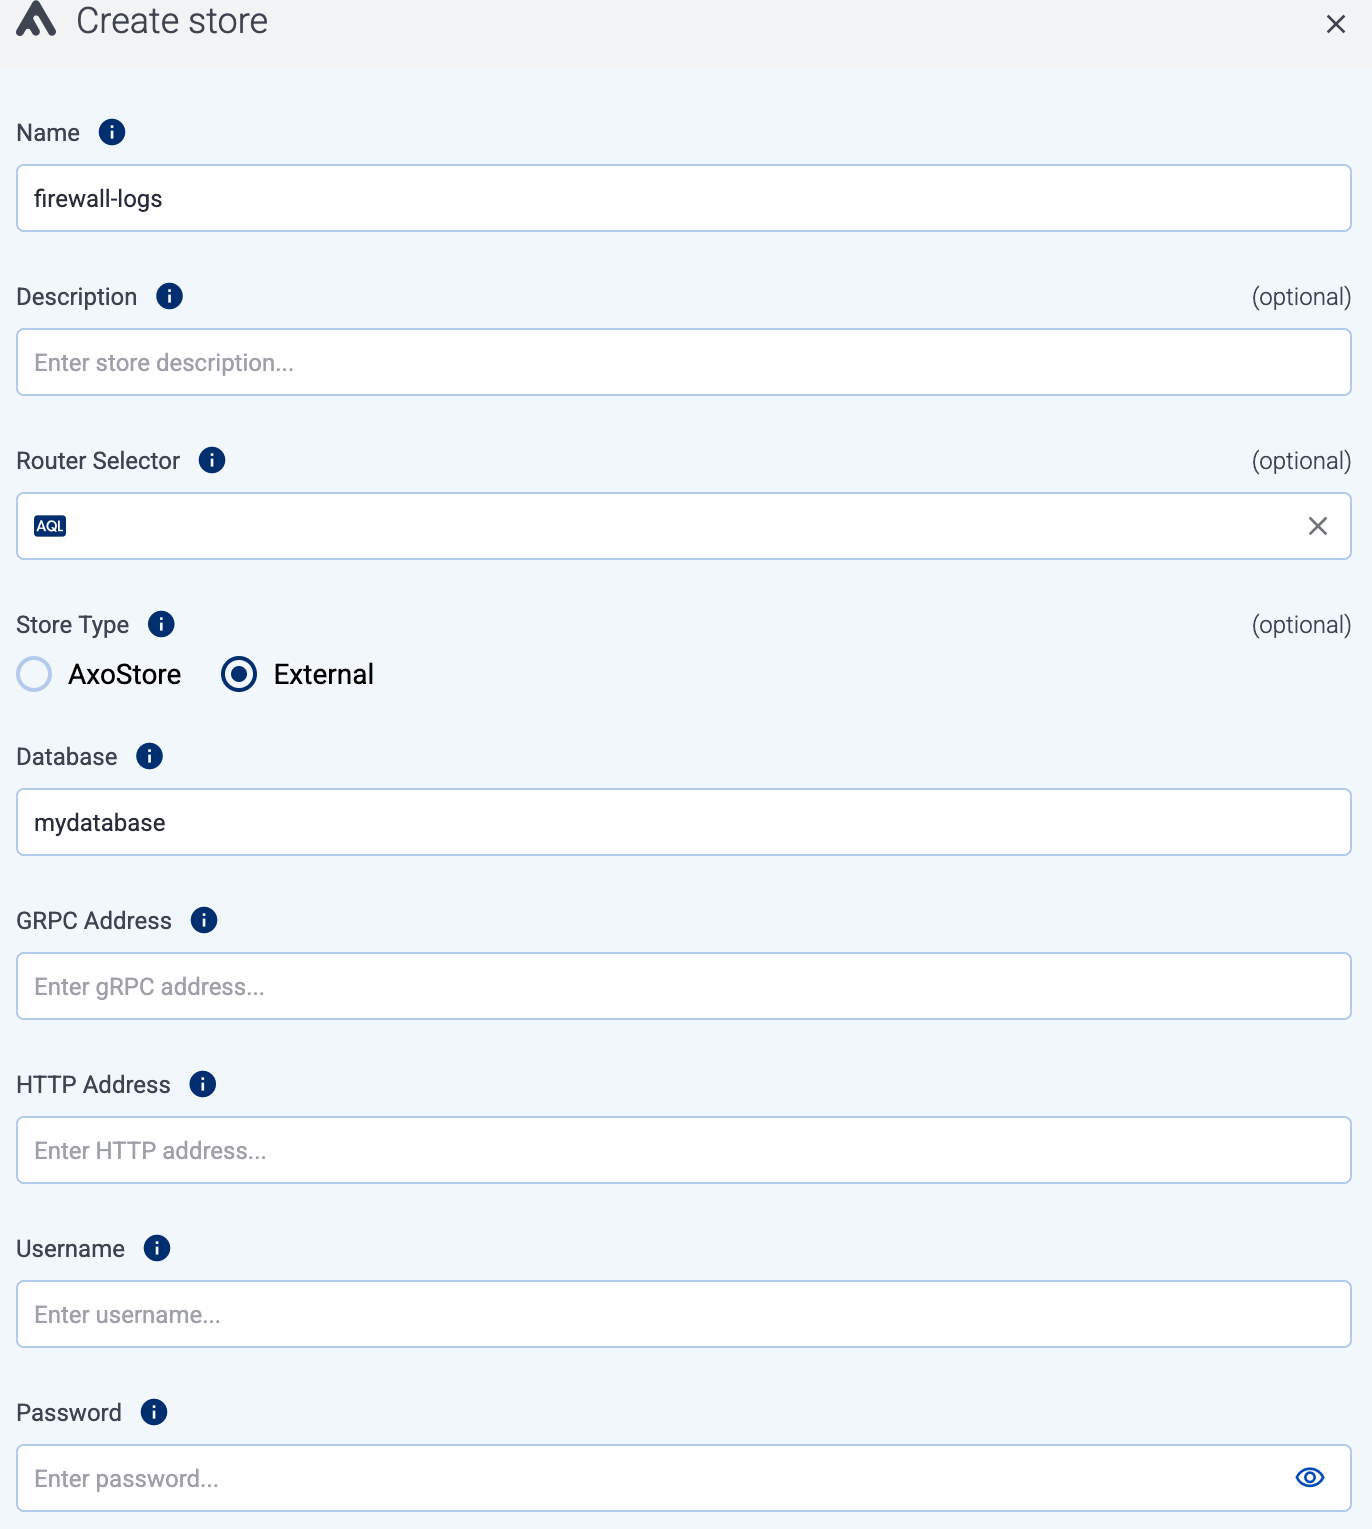
-
(Optional) Enter a description for the store.
-
(Optional) Select additional options about which message parts to store:
-
Include Metadata: If enabled, the metadata of the events is stored as a separate object. Otherwise, only the metadata that has dedicated fields in the Storage schema will be recorded.
-
Include Raw Body: Store also the original, unparsed (raw) message as a separate field.
CAUTION:
Enabling this option approximately doubles the storage size of the message.
-
-
Set Store type to External.
-
Enter the name of the Database to create the store in. (This is the name of the database you’ve created in AxoLake/Clickhouse. It can only contain letters, numbers, and underscores.)
-
Set the gRPC Address and the HTTP Address of the database listener, for example,
10.0.0.123:9100and10.0.0.123:9000. Instead of IP address, you can also use FQDN. -
Enter the credentials of the user account used to access the database into the User and Password fields.
-
Select Create.