Amazon S3
Amazon S3: Scalable cloud storage service for storing and retrieving any amount of data via object storage.
To add an Amazon S3 destination to Axoflow, complete the following steps.
Prerequisites
-
An existing S3 bucket configured for programmatic access, and the related
ACCESS_KEYandSECRET_KEYof a user that can access it. The user needs to have the following permissions:s3:ListBuckets3:ListBucketMultipartUploadss3:AbortMultipartUploads3:ListMultipartUploadPartss3:PutObject
See a sample IAM policy
{ "Version": "2012-10-17", "Statement": [ { "Sid": "bucketLevel", "Effect": "Allow", "Action": [ "s3:ListBucket", "s3:ListBucketMultipartUploads", "s3:AbortMultipartUpload", "s3:ListMultipartUploadParts" ], "Resource": "arn:aws:s3:::YOUR-BUCKET-NAME" }, { "Sid": "objectLevel", "Effect": "Allow", "Action": [ "s3:PutObject" ], "Resource": "arn:aws:s3:::YOUR-BUCKET-NAME/*" } ] } -
To configure Axoflow, you’ll need the bucket name, region (or URL), access key, and the secret key of the bucket.
Steps
-
Create a new destination.
- Open the AxoConsole.
- Select Destinations > + Add Destination.
-
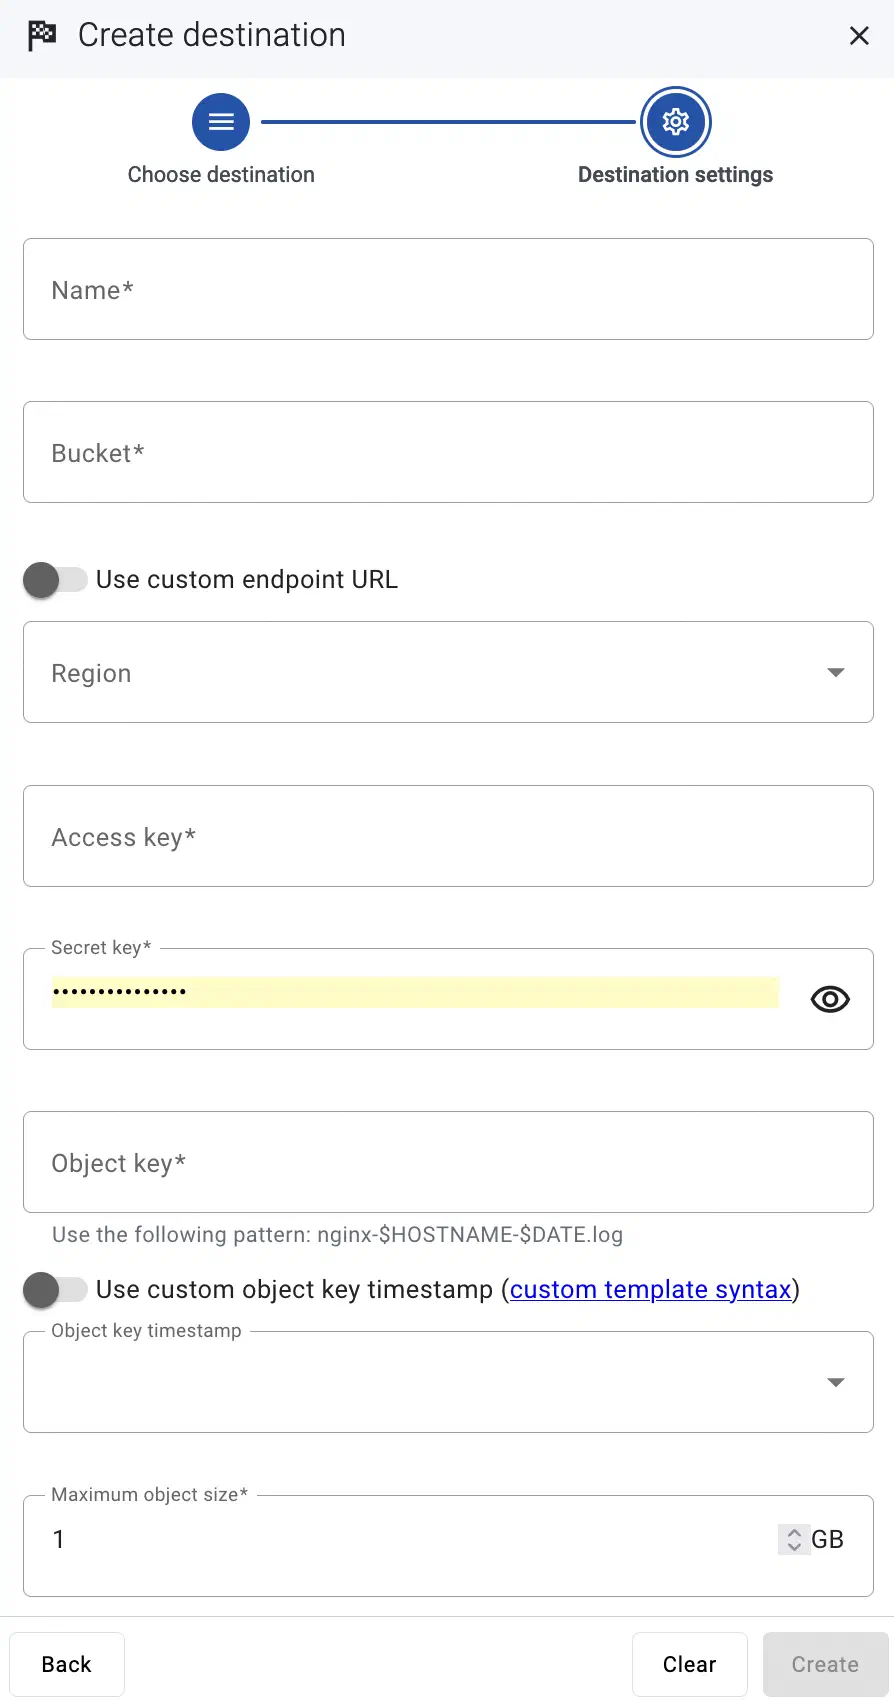
Configure the destination.
-
Select Amazon S3.
-
Enter a name for the destination.
-
Enter the name of the bucket you want to use.
-
Enter the region code of the bucket into the Region field (for example,
us-east-1.), or select the Use custom endpoint URL option, and enter the URL of the endpoint into the URL field. -
Enter the Access key and the Secret key for the account you want to use.
-
Enter the Object key (or key name), which uniquely identifies the object in an Amazon S3 bucket, for example:
my-logs/${HOSTNAME}/.You can use AxoSyslog macros in this field.
-
Select the Object key timestamp format you want to use, or select Use custom object key timestamp and enter a custom template. For details on the available date-related macros, see the AxoSyslog documentation.
-
Set the maximal size of the S3 object in the Maximum object size field. If an object reaches this size, Axoflow appends an index ("-1", “-2”, …) to the end of the object key and starts a new object after rotation.
-
(Optional) If needed, adjust the size of messages written to the S3 object in a batch using the Chunk size field.
-
(Optional) Set other options as needed for your environment.
-
Select Add.
-
-
Create a flow to connect the new destination to an AxoRouter instance.
-
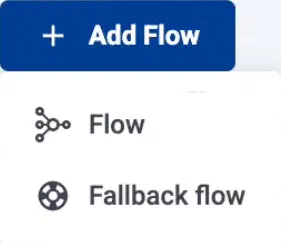
Select Flows.
-
Select Add Flow > Flow.
To create a fallback flow, select Add Flow > Fallback flow.
-
Enter a name for the flow, for example,
my-test-flow.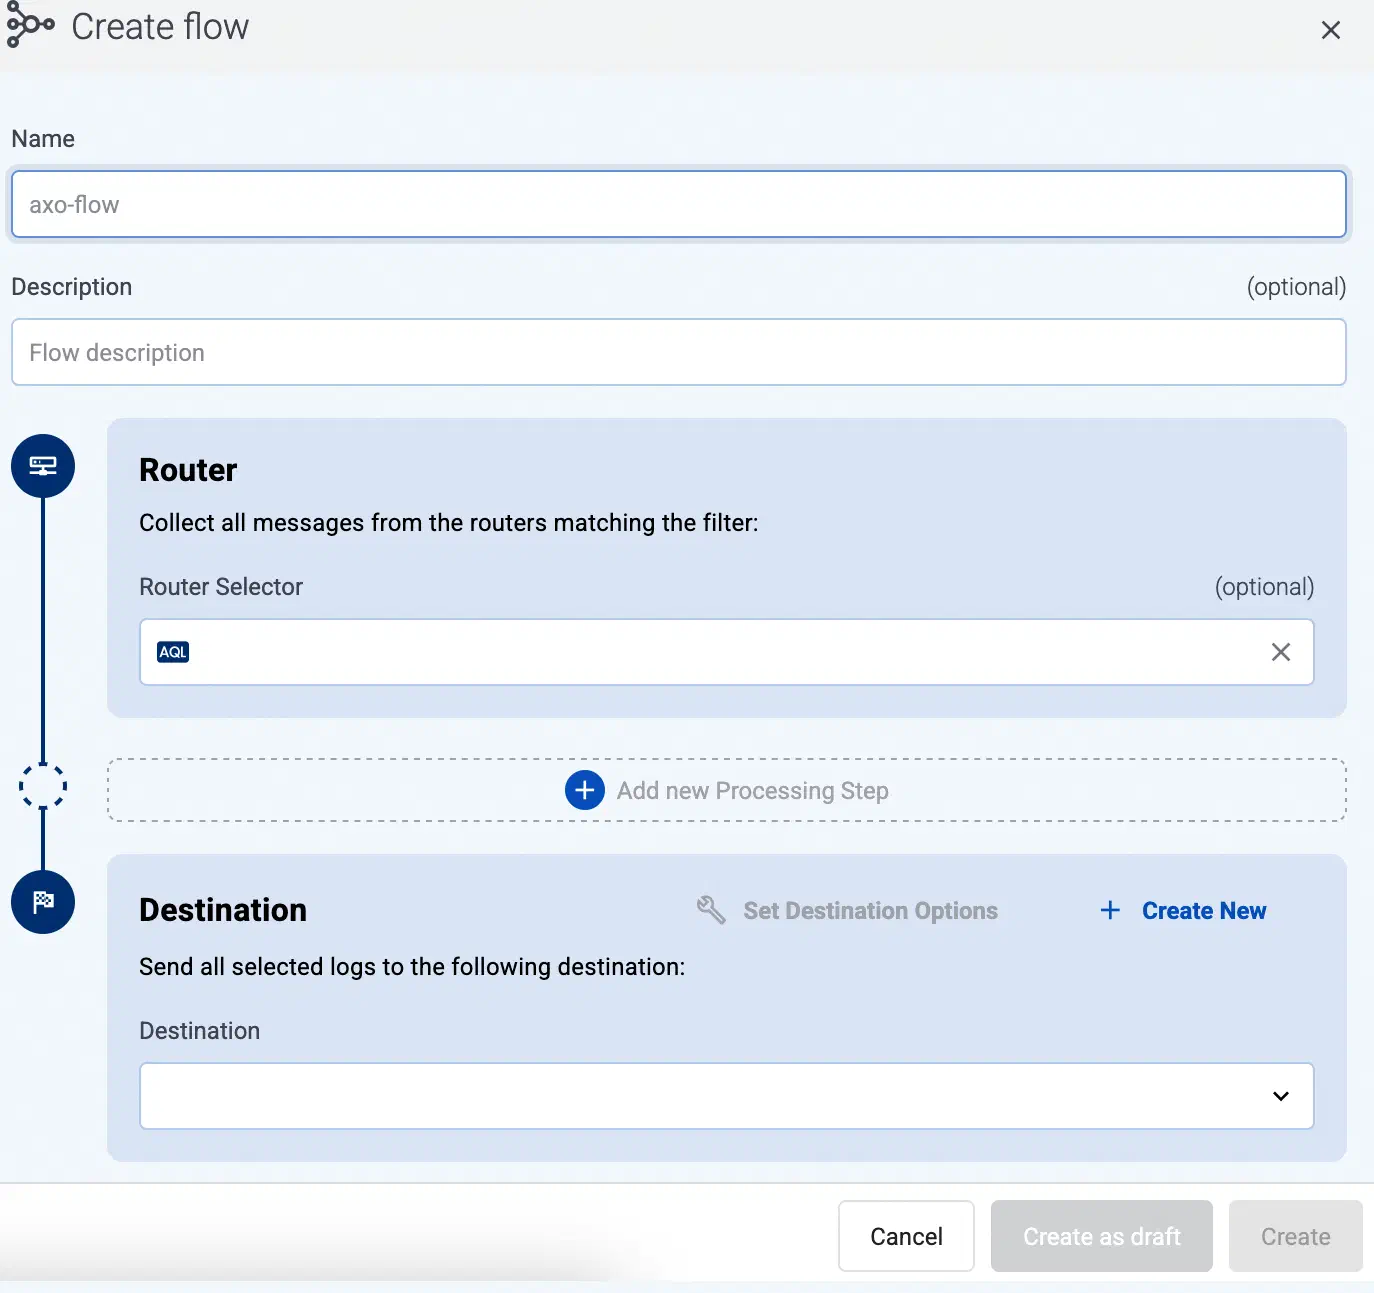
-
In the Router Selector field, enter an expression that matches the router(s) you want to apply the flow. To select a specific router, use a name selector, for example,
name = my-axorouter-hostname.You can use any labels and metadata of the AxoRouter hosts in the Router selectors, for example, the hostname of the AxoRouter, or any custom labels.
- If you leave the Router Selector field empty, the selector will match every AxoRouter instance.
- To select only a specific AxoRouter instance, set the
namefield to the name of the instance as selector. For example,name = my-axorouter. - If you set multiple fields in the selector, the selector will match only AxoRouter instances that match all elements of the selector. (There in an AND relationship between the fields.)
Note You can configure multiple fallback flows, but only one fallback flow can apply to an AxoRouter (so the Router Selector of the fallback flows can’t overlap). -
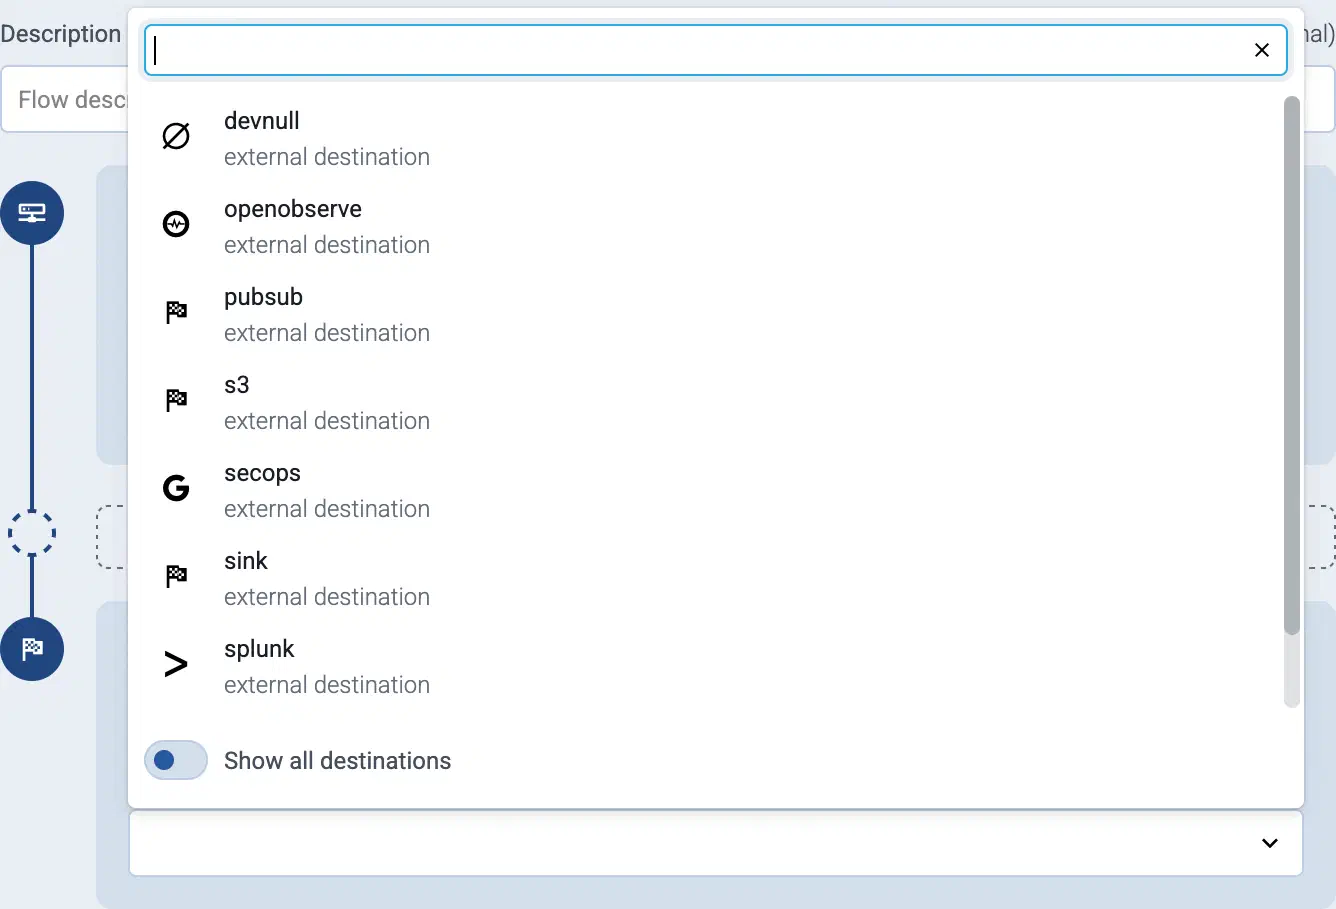
Select the Destination where you want to send your data. If you don’t have any destination configured, you can select + Add in the destination section to create a new destination now. For details on the different destinations, see Destinations.
- If you don’t have any destination configured, see Destinations.
- If you’ve already created a store, it automatically available as a destination. Note that the Router Selector of the flow must match only AxoRouters that have the selected store available, otherwise you’ll get an error message.
- If you want to send data to another AxoRouter, enable the Show all destinations option, and select the connector of the AxoRouter where you want to send the data.
-
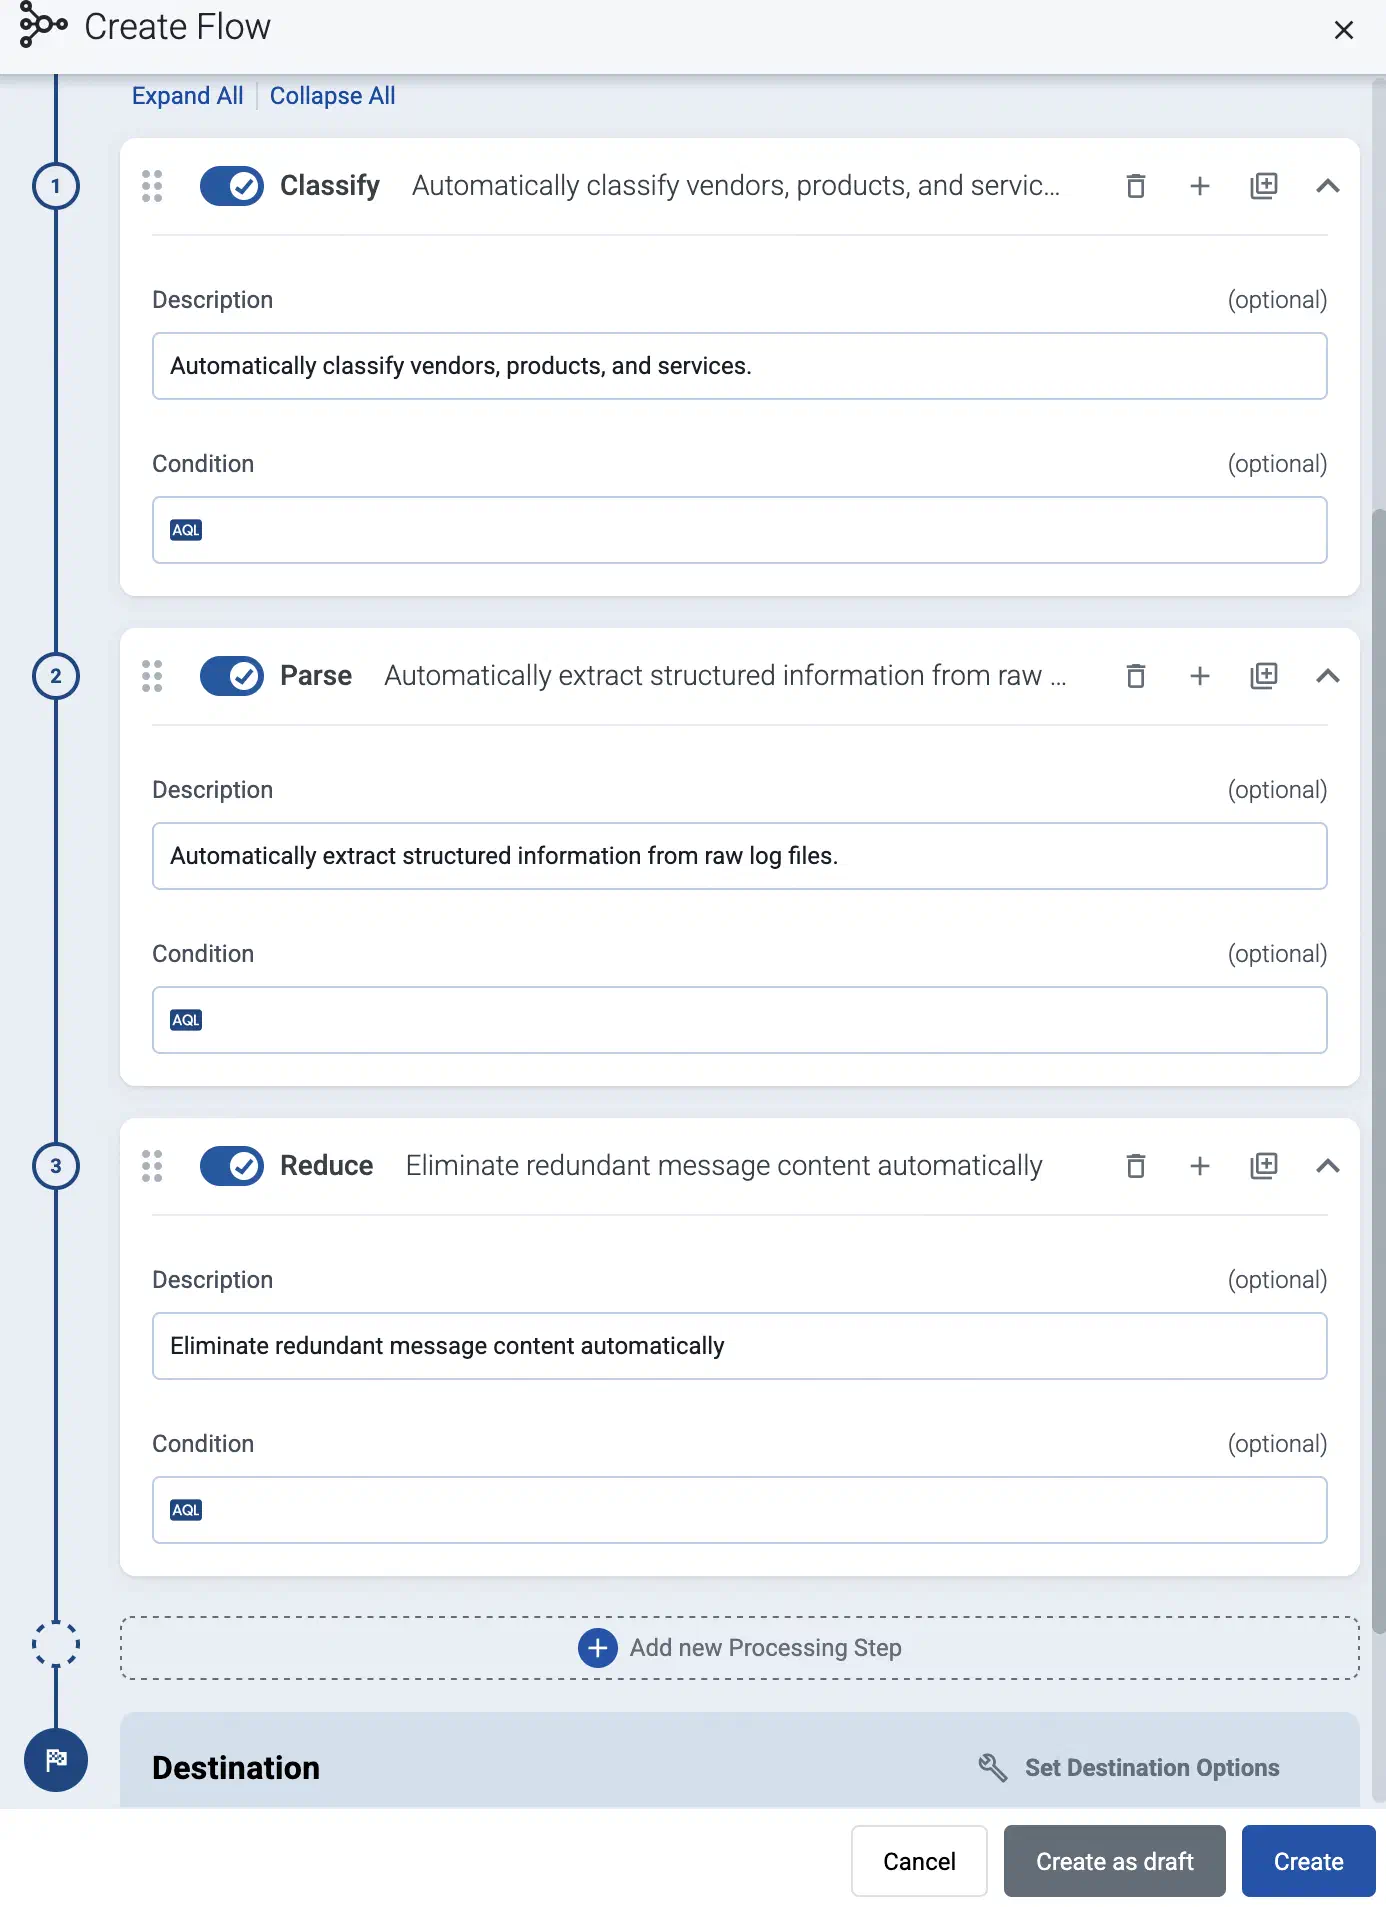
(Optional) To process the data transferred in the flow, select Add New Processing Step. For details, see Processing steps. For example:
- Add a Classify, a Parse, and a Reduce step, in that order, to automatically remove redundant and empty fields from your data.
- To select which messages are processed by the flow, add a Select Messages step, and enter a filter into the AQL Expression field. For example, to select only the messages received from Fortinet FortiGate firewalls, use the
meta.vendor = fortinet AND meta.product = fortigatequery. - Save the processing steps.
-
Select Add.
-
The new flow appears in the Flows list.

-
Related message fields
You can use the following message fields to modify messages sent to this destination using processing steps.