Amazon S3
Amazon S3: Scalable cloud storage service for storing and retrieving any amount of data via object storage.
To add an Amazon S3 destination to Axoflow, complete the following steps.
Prerequisites
-
An existing S3 bucket configured for programmatic access, and the related
ACCESS_KEYandSECRET_KEYof a user that can access it. The user needs to have the following permissions:s3:ListBuckets3:ListBucketMultipartUploadss3:AbortMultipartUploads3:ListMultipartUploadPartss3:PutObject
See a sample IAM policy
{ "Version": "2012-10-17", "Statement": [ { "Sid": "bucketLevel", "Effect": "Allow", "Action": [ "s3:ListBucket", "s3:ListBucketMultipartUploads", "s3:AbortMultipartUpload", "s3:ListMultipartUploadParts" ], "Resource": "arn:aws:s3:::YOUR-BUCKET-NAME" }, { "Sid": "objectLevel", "Effect": "Allow", "Action": [ "s3:PutObject" ], "Resource": "arn:aws:s3:::YOUR-BUCKET-NAME/*" } ] } -
To configure Axoflow, you’ll need the bucket name, region (or URL), access key, and the secret key of the bucket.
Steps
-
Create a new destination.
- Open the AxoConsole.
- Select Destinations > + Add Destination.
-
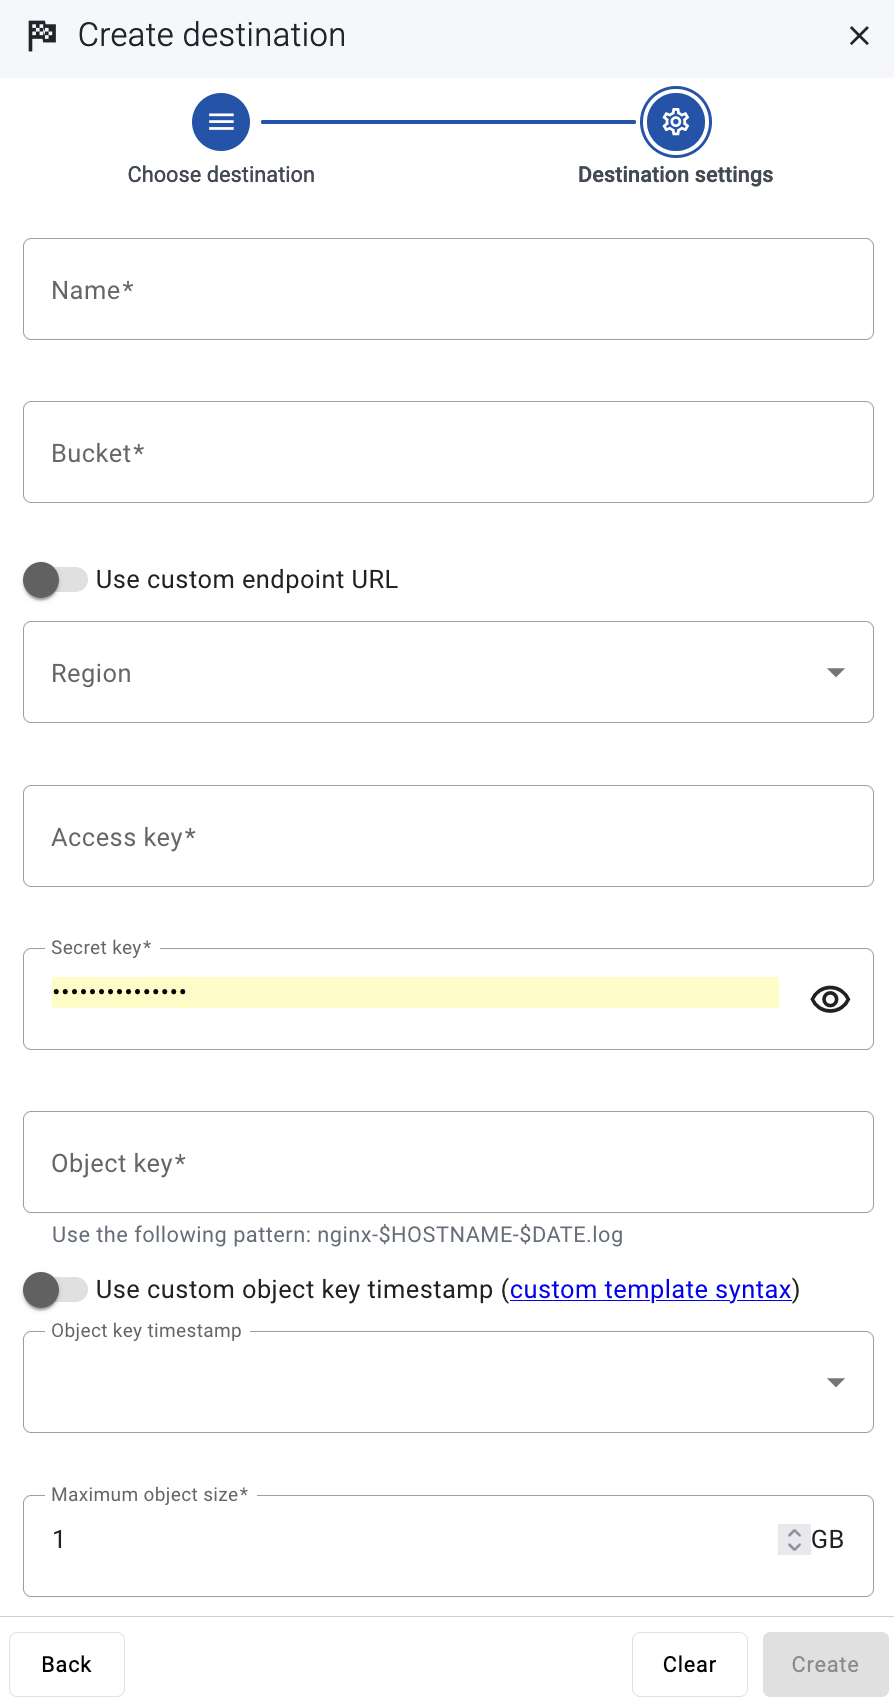
Configure the destination.
-
Select Amazon S3.
-
Enter a name for the destination.
-
Enter the name of the bucket you want to use.
-
Enter the region code of the bucket into the Region field (for example,
us-east-1.), or select the Use custom endpoint URL option, and enter the URL of the endpoint into the URL field. -
Enter the Access key and the Secret key for the account you want to use.
-
Enter the Object key (or key name), which uniquely identifies the object in an Amazon S3 bucket, for example:
my-logs/${HOSTNAME}/.You can use AxoSyslog macros in this field.
- Select the Object key timestamp format you want to use, or select Use custom object key timestamp and enter a custom template. For details on the available date-related macros, see the AxoSyslog documentation.
- Set the maximal size of the S3 object. If an object reaches this size, Axoflow appends an index ("-1", “-2”, …) to the end of the object key and starts a new object after rotation.
- Select Add.
-
-
Create a flow to connect the new destination to an AxoRouter instance.
-
Select Flows.
-
Select Add Flow.
-
Enter a name for the flow, for example,
my-test-flow.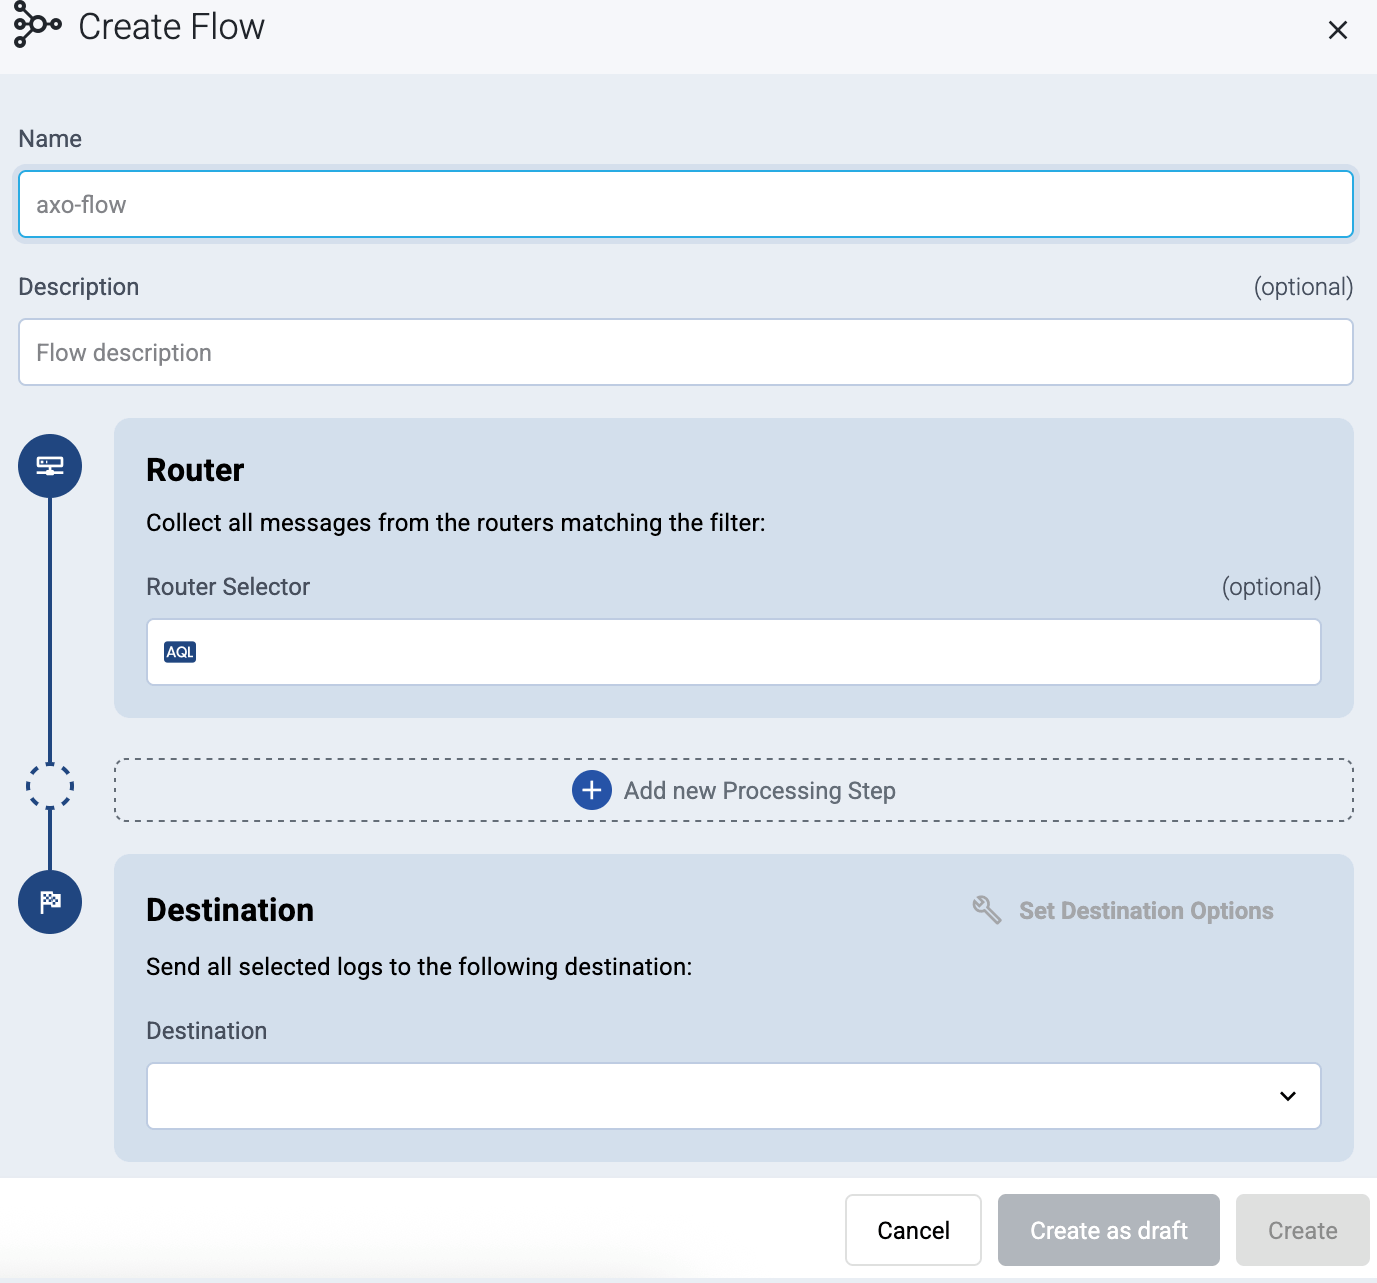
-
In the Router Selector field, enter an expression that matches the router(s) you want to apply the flow. To select a specific router, use a name selector, for example,
name = my-axorouter-hostname.You can use any labels and metadata of the AxoRouter hosts in the Router selectors, for example, the hostname of the AxoRouter, or any custom labels.
- If you leave the Router Selector field empty, the selector will match every AxoRouter instance.
- To select only a specific AxoRouter instance, set the
namefield to the name of the instance as selector. For example,name = my-axorouter. - If you set multiple fields in the selector, the selector will match only AxoRouter instances that match all elements of the selector. (There in an AND relationship between the fields.)
-
Select the Destination where you want to send your data. If you don’t have any destination configured, you can select + Add in the destination section to create a new destination now. For details on the different destinations, see Destinations.
- If you don’t have any destination configured, see Destinations.
- If you’ve already created a store, it automatically available as a destination. Note that the Router Selector of the flow must match only AxoRouters that have the selected store available, otherwise you’ll get an error message.
- If you want to send data to another AxoRouter, enable the Show all destinations option, and select the connector of the AxoRouter where you want to send the data.

-
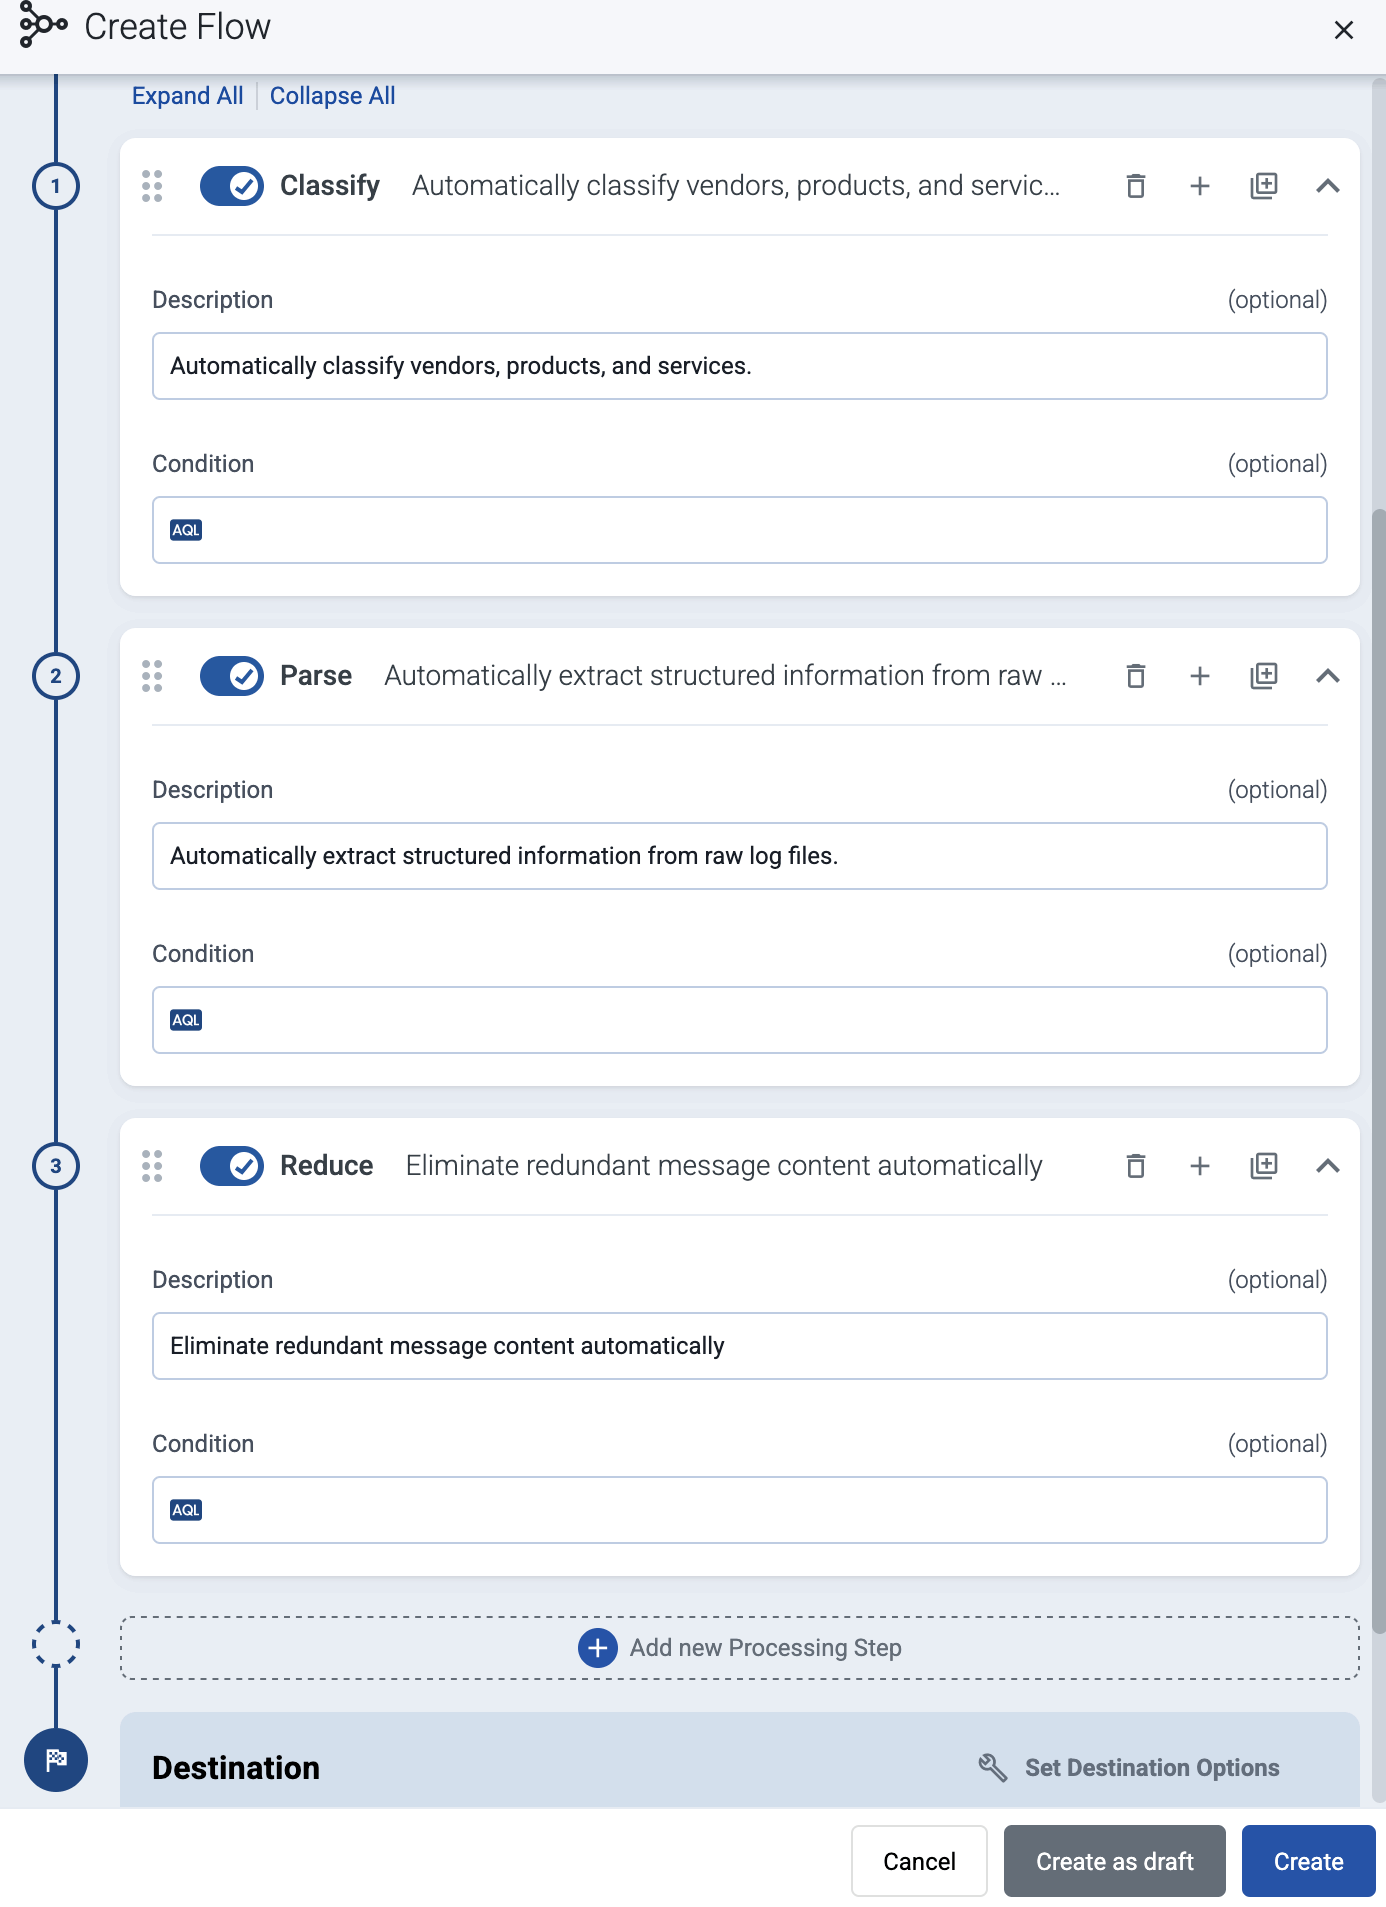
(Optional) To process the data transferred in the flow, select Add New Processing Step. For details, see Processing steps. For example:
- Add a Classify, a Parse, and a Reduce step, in that order, to automatically remove redundant and empty fields from your data.
- To select which messages are processed by the flow, add a Select Messages step, and enter a filter into the AQL Expression field. For example, to select only the messages received from Fortinet FortiGate firewalls, use the
meta.vendor = fortinet AND meta.product = fortigatequery. - Save the processing steps.
-
Select Add.
-
The new flow appears in the Flows list.

-
Related message fields
You can use the following message fields to modify messages sent to this destination using processing steps.