1 - Eyeglass
Eyeglass: Manages and automates data protection, DR, and reporting for PowerScale environments.
The following sections show you how to configure Superna Eyeglass to send their log data to Axoflow.
CAUTION:
Make sure to set data forwarding on your appliances/servers as described in this guide. Different settings like alternate message formats or ports might be valid, but can result in data loss or incorrect parsing.Prerequisites
- You have administrative access to Superna Eyeglass.
- You have an AxoRouter deployed and configured with a webhook connector. This device is going to receive the data from Superna Eyeglass.
-
You know the IP address the AxoRouter. To find it:
- Open the AxoConsole.
- Select the Routers or the Topology page.
- Select on AxoRouter instance that is going to receive the logs.
- Check the Networks > Address field.
Steps
Note: The steps involving the Superna Eyeglass user interface are just for your convenience, for details, see the official documentation.
-
Log in to Ransomware Defender and open the Zero Trust menu.
-
Click the plus sign to add a webhook target.
-
Set the parameters of the webhook.
- Name: Enter a name for the webhook, for example,
Axoflow. - URL: Enter the URL of the webhook connector of the AxoRouter instance where you want to post messages.
- Event Severity Filter: Select the severities of the events that you want to forward to the webhook.
- Lifecycle filter: Select the lifecycle changes that trigger a post message to the webhook.
- Name: Enter a name for the webhook, for example,
-
Click Save, then the Test webhooks button. This will send a post message with a sample payload.
-
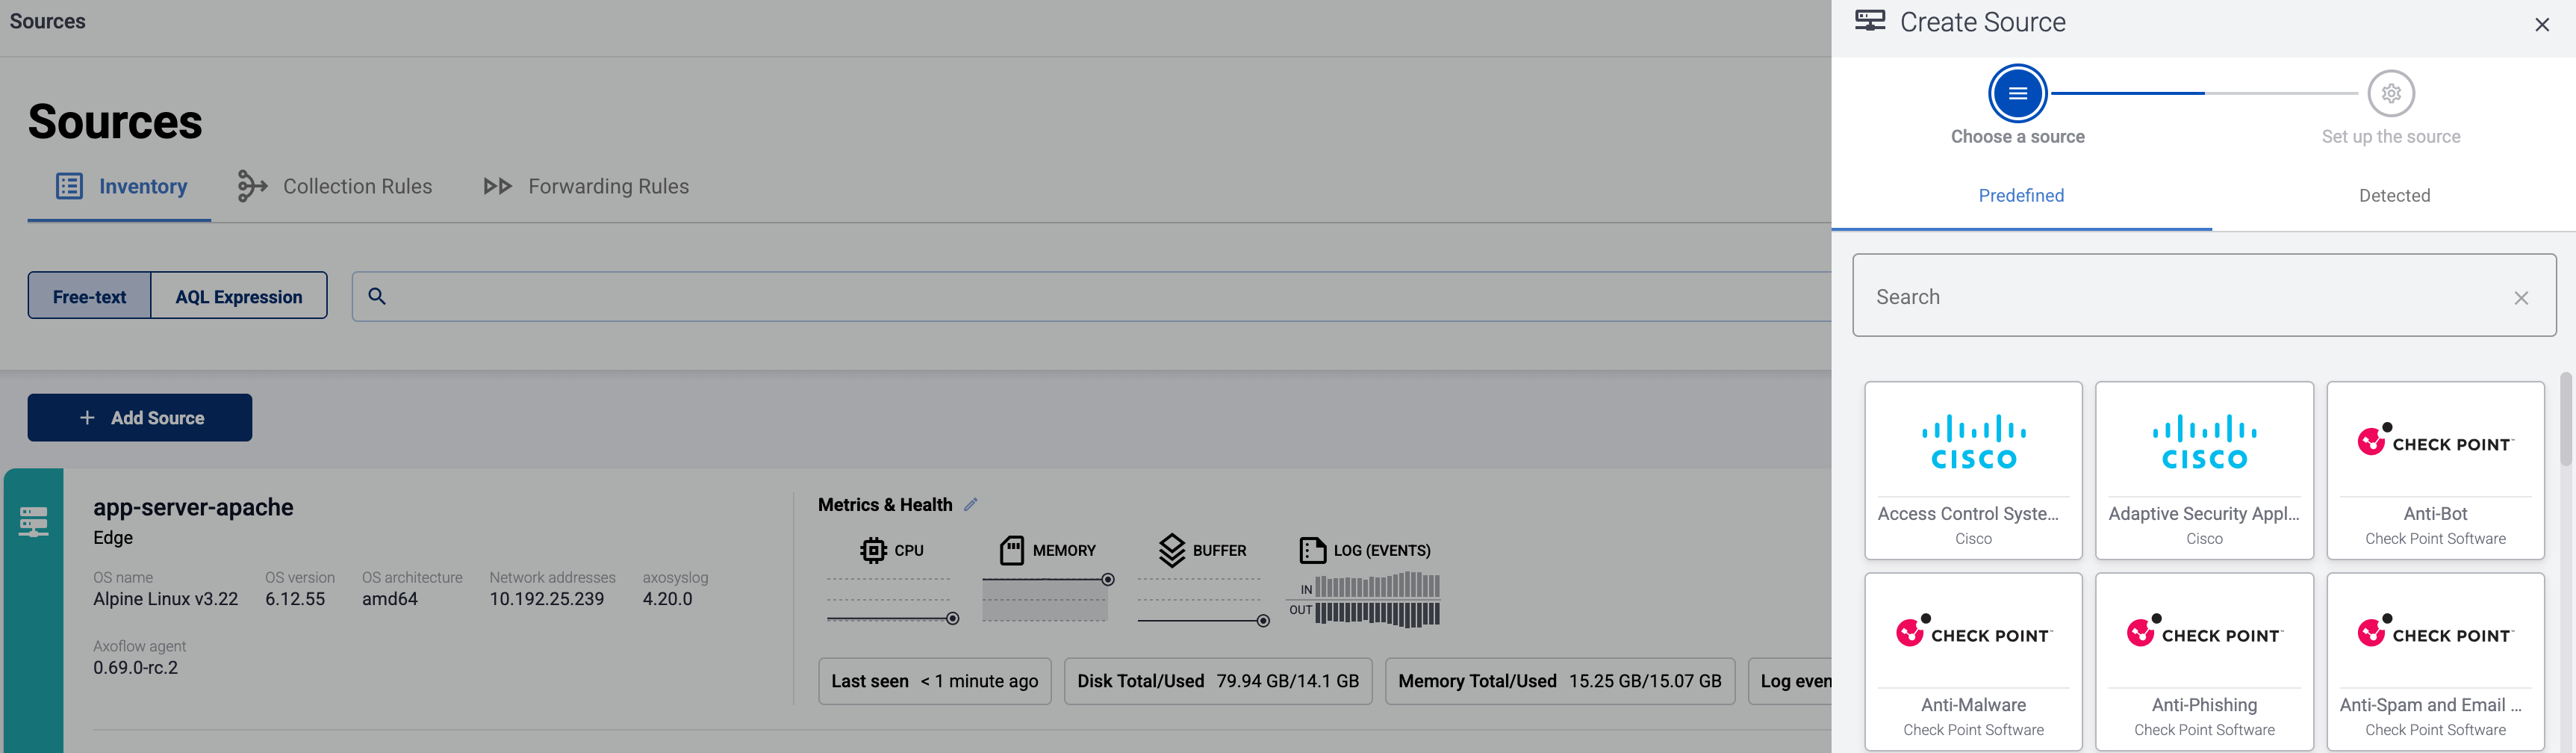
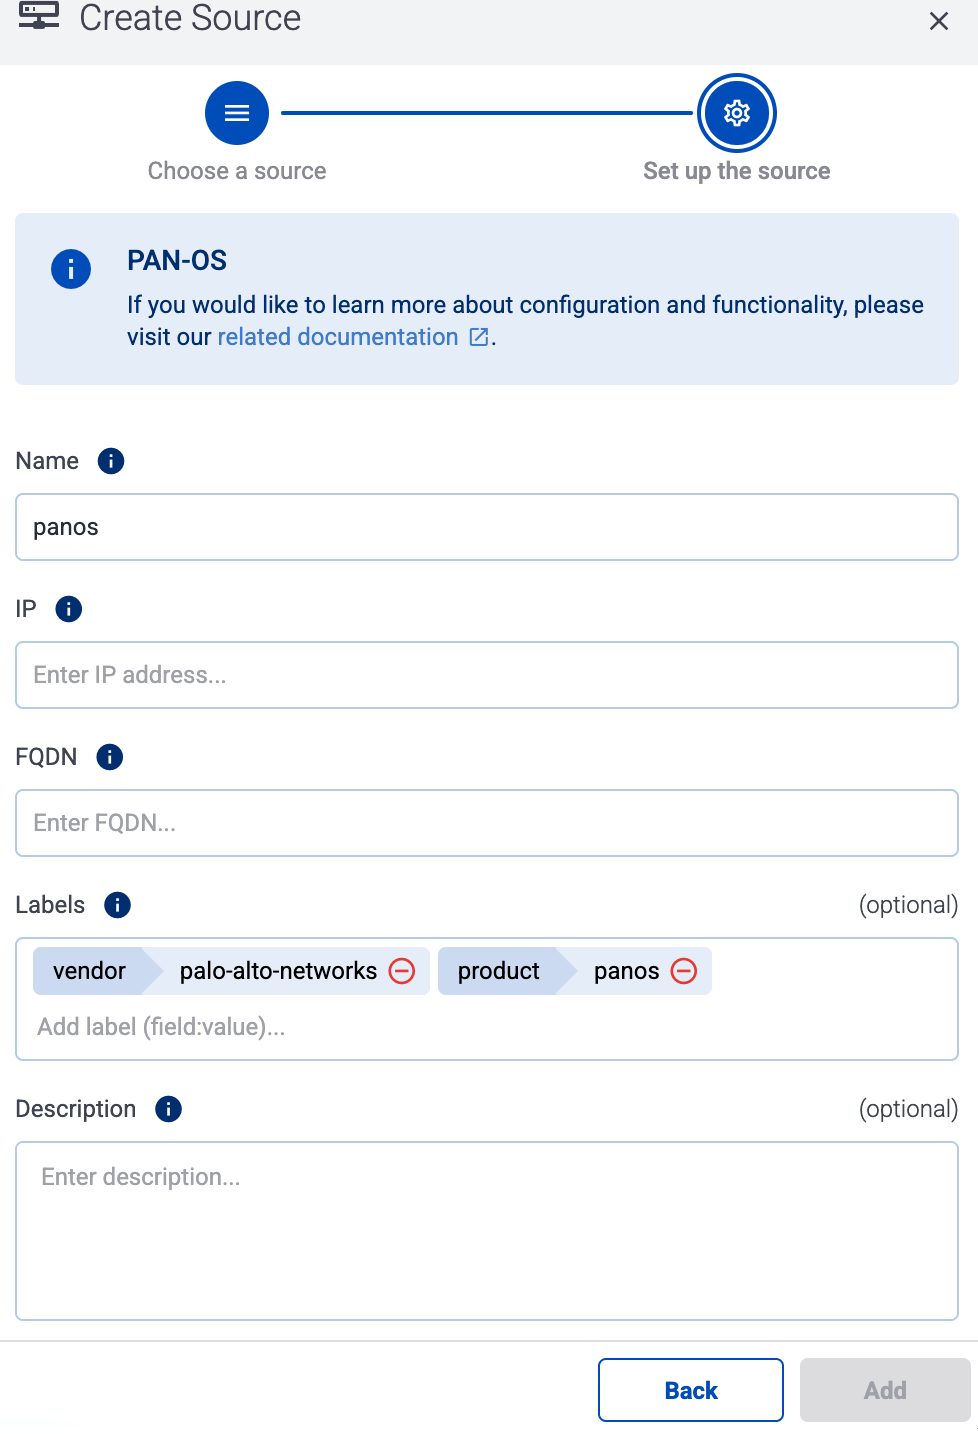
Add the source to AxoConsole.
-
Open the AxoConsole and select Topology.
-
Select Add Item > Source.
-
If the source is actively sending data to an AxoRouter instance, select Detected, then select your source.
-
Otherwise, select the vendor and product corresponding to your source from the Predefined sources, then enter the parameters of the source, like IP address and FQDN.
Note During log tapping, you can add hosts that are actively sending data to an AxoRouter instance by clicking Register source. -
-
(Optional) Add custom labels as needed.
-
Select Add.
-
Labels
Axoflow automatically adds the following labels to data collected from this source:
| Analytics label | Message field | value |
|---|---|---|
vendor |
meta.vendor |
superna |
product |
meta.product |
eyeglass |
You can use the labels as:
- Filter labels on the Analytics page,
- in the Filter By Label field during log tapping.
You can use the message fields
- in Flow Processing steps, for example, in the Query field of Select Messages steps,
- in AQL expressions in the search bars.
Sending data to Splunk
When sending the data collected from this source to Splunk, Axoflow uses the following sourcetype and index settings:
| sourcetype | index |
|---|---|
superna:eyeglass |
main |
Sending data to Google SecOps
When sending the data collected from this source to a dynamic Google SecOps destination, Axoflow sets the following log type: SUPERNA_EYEGLASS.