To install AxoRouter on a Kubernetes cluster, complete the following steps. For other platforms, see AxoRouter.
Prerequisites
Kubernetes version 1.29 and newer
Minimal resource requirements
- CPU: at least
100m - Memory:
256MB - Storage:
8Gi
Network access
The hosts must be able to access the following domains related to the Axoflow Console:
-
When using Axoflow Console SaaS:
<your-tenant-id>.cloud.axoflow.io: HTTPS traffic on TCP port 443, needed to download the binaries for Axoflow software (like Axolet and AxoRouter).kcp.<your-tenant-id>.cloud.axoflow.io: HTTPS (mutual TLS) traffic on TCP port 443 for management traffic.telemetry.<your-tenant-id>.cloud.axoflow.io: HTTPS (mutual TLS) traffic on TCP port 443, where Axolet sends the metrics of the host.us-docker.pkg.dev: HTTPS traffic on TCP port 443, for pulling container images (AxoRouter only).
-
When using an on-premise Axoflow Console:
-
The following domains should point to Axoflow Console IP address to access Axoflow from your desktop and AxoRouter hosts:
your-host.your-domain: The main domain of your Axoflow Console deployment.authenticate.your-host.your-domain: A subdomain used for authentication.idp.your-host.your-domain: A subdomain for the identity provider.
-
The Axoflow Console host must have the following Open Ports:
- Port 80 (HTTP)
- Port 443 (HTTPS)
-
Install AxoRouter
-
Open the Axoflow Console.
-
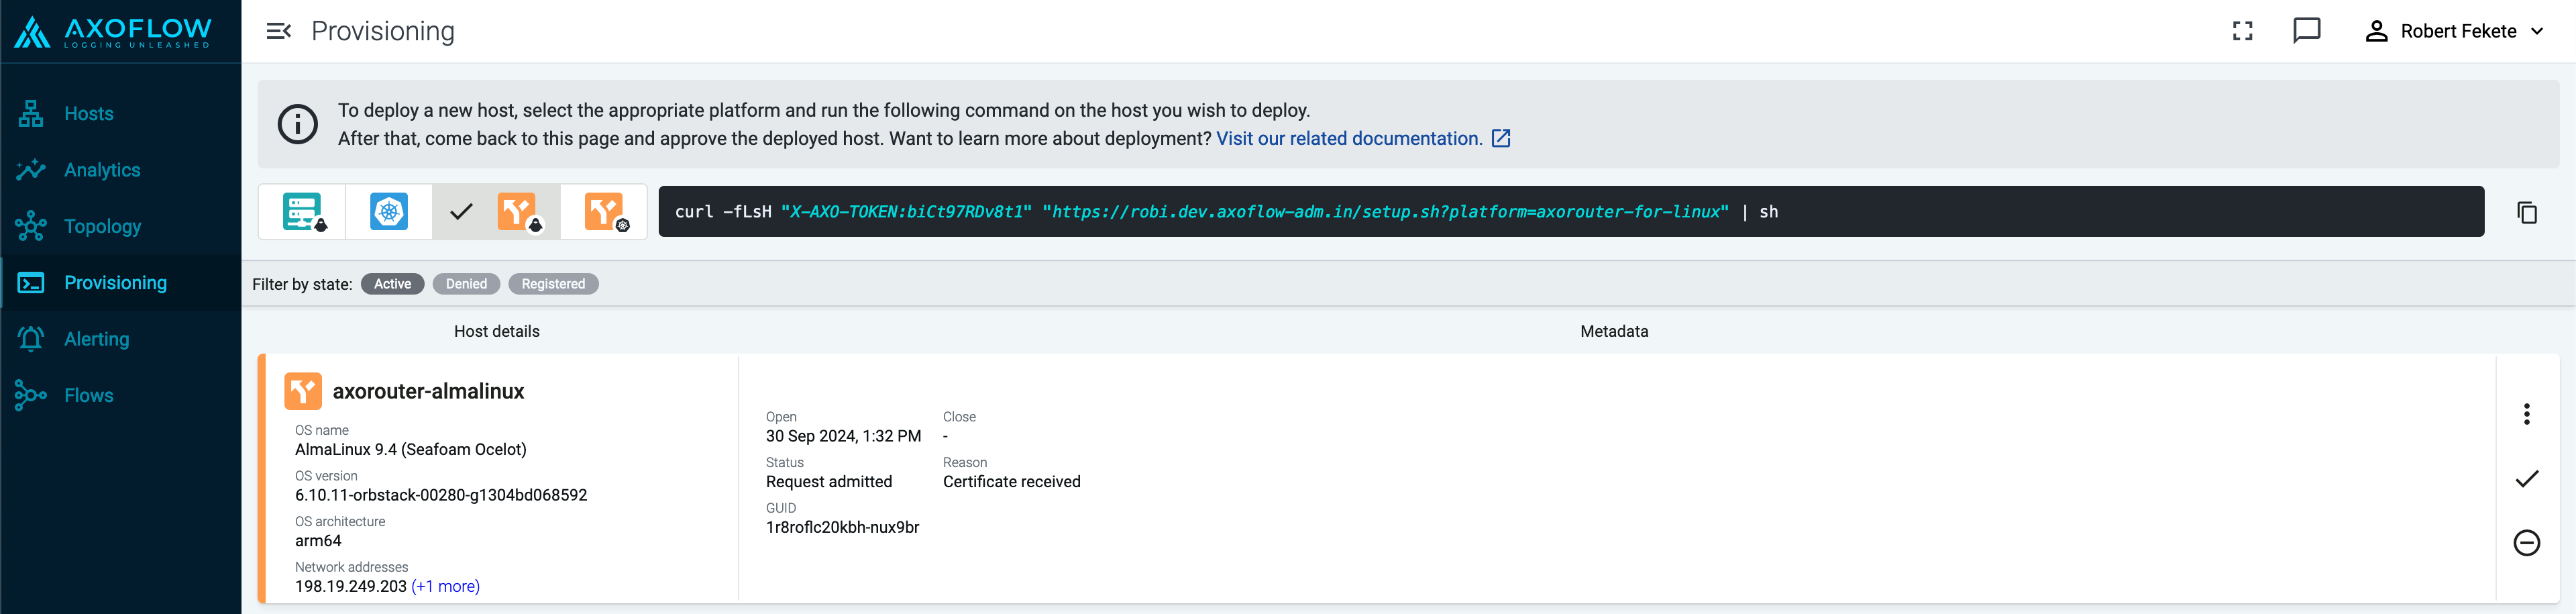
Select Provisioning.
-
Select the Host type > AxoRouter > Kubernetes. The one-liner installation command is displayed.
-
Open a terminal and set your Kubernetes context to the cluster where you want to install AxoRouter.
-
Run the one-liner, and follow the on-screen instructions.
Current kubernetes context: minikube Server Version: v1.28.3 Installing to new namespace: axorouter Do you want to install AxoRouter now? [Y] -
Register the host.
-
Reload the Provisioning page. There should be a registration request for the new AxoRouter deployment. Select ✓.
-
Select Register to register the host. You can add a description and labels (in
label:valueformat) to the host. -
Select the Topology page. The new AxoRouter instance is displayed.
-
Create a flow
- If you haven’t already done so, create a new destination.
-
Create a flow to connect the new AxoRouter to the destination.
-
Select Flows.
-
Select Create New Flow.
-
Enter a name for the flow, for example,
my-test-flow.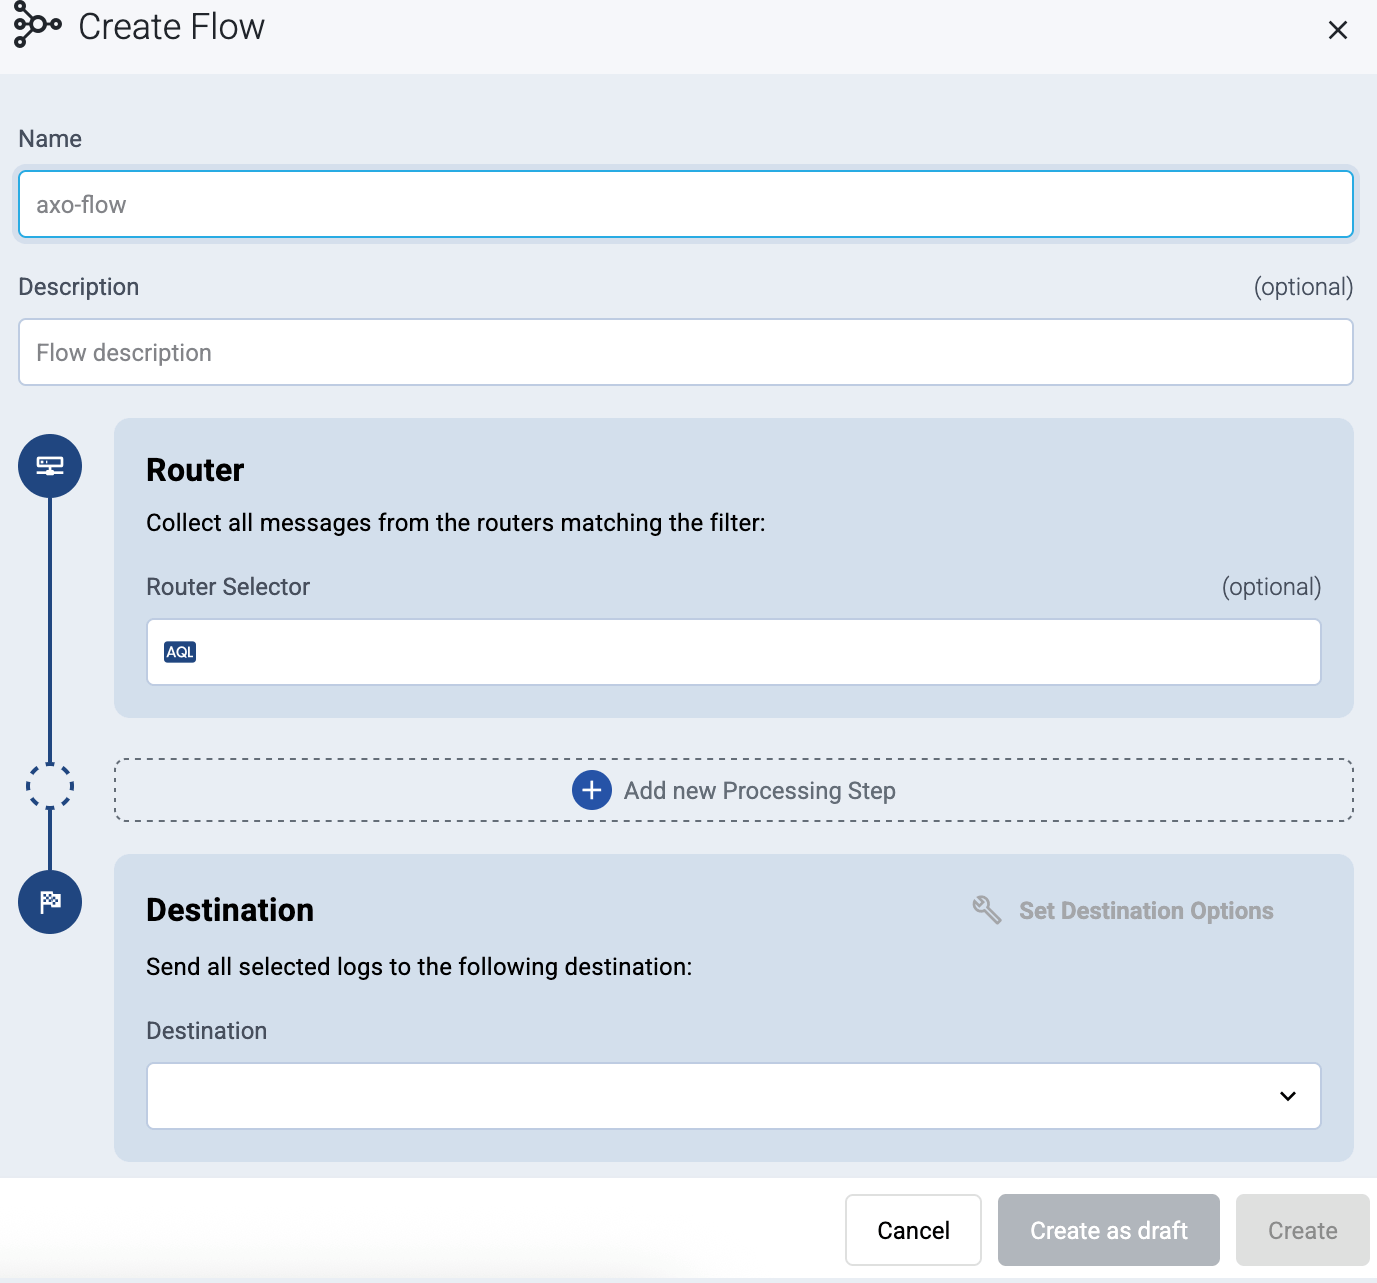
-
In the Router Selector field, enter an expression that matches the router(s) you want to apply the flow. To select a specific router, use a name selector, for example,
name = my-axorouter-hostname. -
Select the Destination where you want to send your data. If you don’t have any destination configured, see Destinations.
By default, you can select only external destinations. If you want to send data to another AxoRouter, enable the Show all destinations option, and select the connector of the AxoRouter where you want to send the data.

-
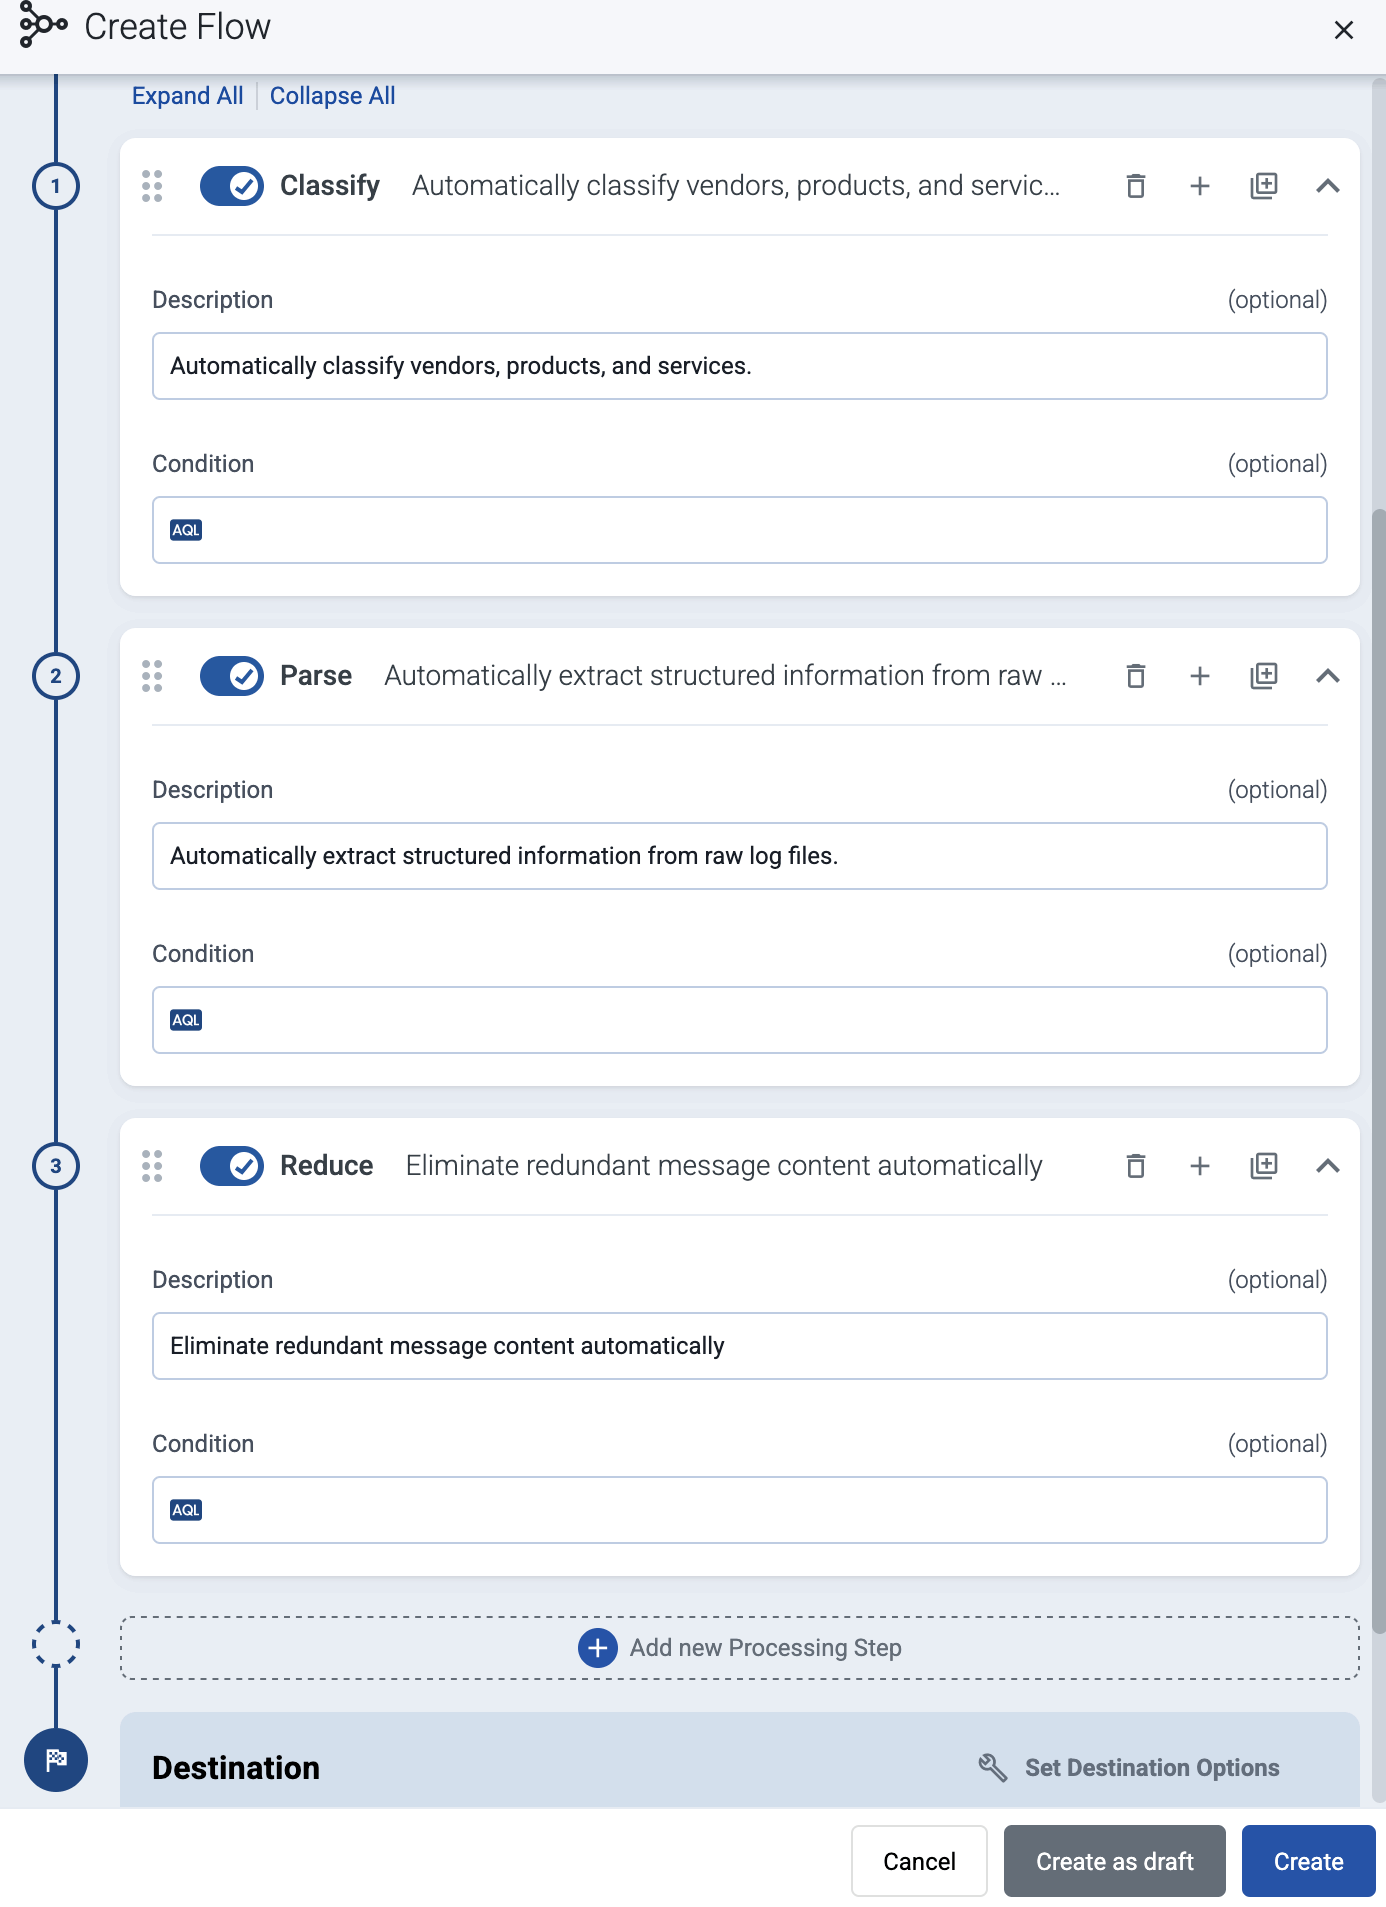
(Optional) To process the data transferred in the flow, select Add New Processing Step. For details, see Processing steps. For example:
- Add a Reduce step to automatically remove redundant and empty fields from your data.
- To select which messages are processed by the flow, add a Select Messages step, and enter a filter into the Query field. For example, to select only the messages received from Fortinet FortiGate firewalls, use the
meta.vendor = fortinet + meta.product = fortigatequery. - Save the processing steps.
-
Select Create.
-
The new flow appears in the Flows list.

-
Send logs to AxoRouter
By default, AxoRouter accepts data on the following ports (unless you’ve modified the default connector rules):
- 514 UDP and TCP for RFC3164 (BSD-syslog) and RFC5424 (IETF-syslog) formatted traffic. AxoRouter automatically recognizes and handles both formats.
- 601 TCP for RFC5424 (IETF-syslog) and RFC3164 (BSD-syslog) formatted traffic. AxoRouter automatically recognizes and handles both formats.
- 6514 TCP for TLS-encrypted syslog traffic.
- 4317 TCP for OpenTelemetry log data.
To receive data on other ports or other protocols, configure other connector rules for the AxoRouter host.
For TLS-encrypted syslog connections, create a new connector rule or edit an existing one, and configure the keys and certificates needed to encrypt the connections. For details, see Syslog.
Upgrade AxoRouter
Axoflow Console raises an alert for the host when a new AxoRouter version is available. To upgrade to the new version, re-run the one-liner installation command you used to install AxoRouter, or select Provisioning > Select type and platform to create a new one.
