1 - Elastic Cloud and Elasticsearch
To add an Elasticsearch destination to Axoflow, complete the following steps.
Prerequisites
- An Elastic Cloud account for Axoflow, or
- a self-hosted Elasticsearch deployment.
- To configure Axoflow, you’ll need the username, password, and the Elasticsearch index where you want to send your data.
Steps
-
Create a new destination.
- Open the Axoflow Console.
- Select Topology.
- Select + > Destination.
-
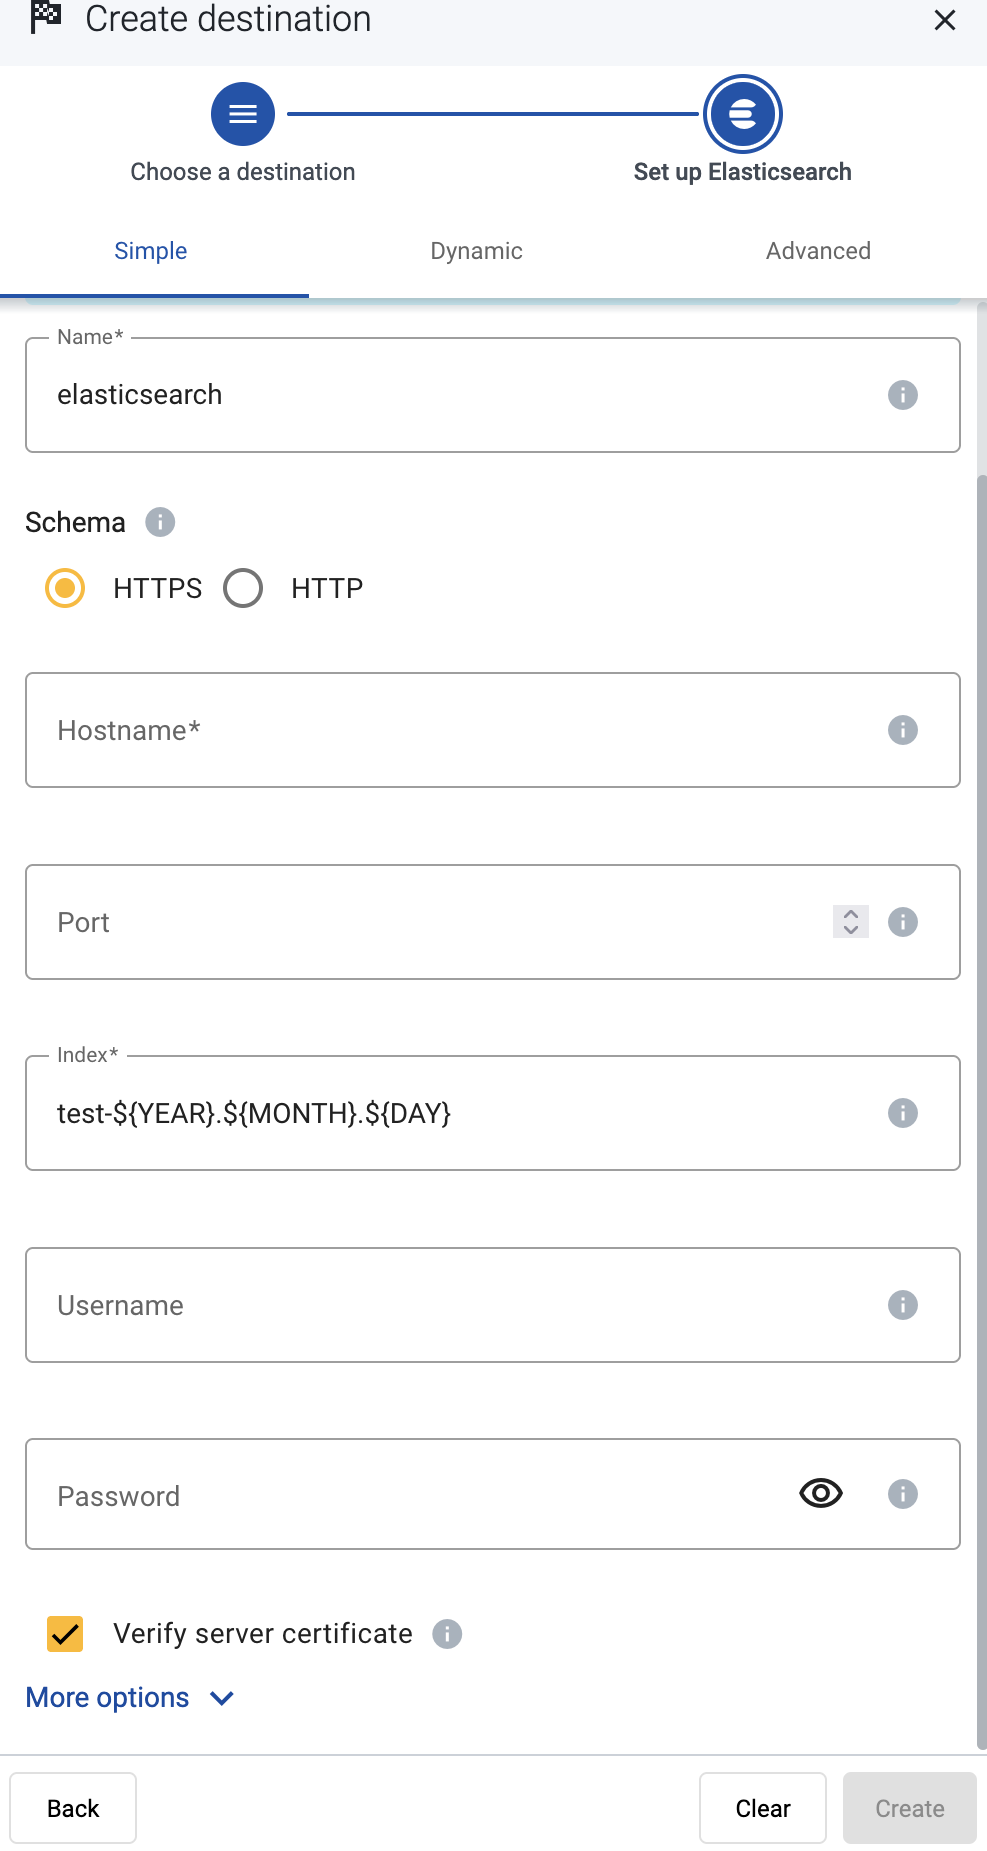
Configure the destination.
-
Select Elasticsearch.
-
Select which type of configuration you want to use:
- Simple: Send all data into a single index.
- Dynamic: Send data to an index based on the content or metadata of the incoming messages (or to a default index).
- Advanced: Allows you to specify a custom URL endpoint.
-
Enter a name for the destination.
-
Configure the endpoint of the destination.
- Advanced: Enter your Elasticsearch URL into the URL field, for example,
http://my-elastic-server:9200/_bulk - Simple and Dynamic:
- Select the HTTPS or HTTP protocol to use to access your destination.
- Enter the Hostname and Port of the destination.
- Advanced: Enter your Elasticsearch URL into the URL field, for example,
-
Specify the Elasticsearch index to send the data to.
- Simple: Enter the expression that specifies the Elasticsearch index to use into the Index field, for example:
test-${YEAR}${MONTH}${DAY}. All data will be sent into this index. - Dynamic and Advanced: Enter the expression that specifies the default index. The data will be sent into this index if no other index is set during the processing of the message (for example, by the processing steps of the Flow).
You can use AxoSyslog macros in this field.
- Simple: Enter the expression that specifies the Elasticsearch index to use into the Index field, for example:
-
Enter the username and password for the account you want to use.
-
(Optional)
By default, Axoflow rejects connections to the destination server if the certificate of the server is invalid (for example, it’s expired, signed by an unknown CA, or its CN and the name of the server is mismatched).
Warning When validating a certificate, the entire certificate chain must be valid, including the CA certificate. If any certificate of the chain is invalid, Axoflow will reject the connection.If you want to accept invalid certificates (or no certificate) from the destination servers, disable the Verify server certificate option.
-
(Optional) Set other options as needed for your environments.
- Timeout: The number of seconds to wait for a log-forwarding request to complete, and attempt to reconnect the server if exceeded. The default (
0) is unlimited. For more details, see the AxoSyslog documentation. - Batch Timeout: Maximal time in milliseconds to wait for a batch to be filled before sending it. The default value (
-1) means that the batch should be full before sending, which may result in a long wait if the incoming traffic is low. For more details, see the AxoSyslog documentation. - Workers: Used for scaling the destination in case of high message load. Specifies the number of worker threads AxoRouter uses for sending messages to the destination. The default is 1. If high message throughput is not a concern, leave it on 1. For maximum performance, increase it up to the number of CPU cores available on AxoRouter. For more details, see the AxoSyslog documentation.
- Timeout: The number of seconds to wait for a log-forwarding request to complete, and attempt to reconnect the server if exceeded. The default (
-
Select Create.
-
-
Create a flow to connect the new destination to an AxoRouter instance.
-
Select Flows.
-
Select Create New Flow.
-
Enter a name for the flow, for example,
my-test-flow.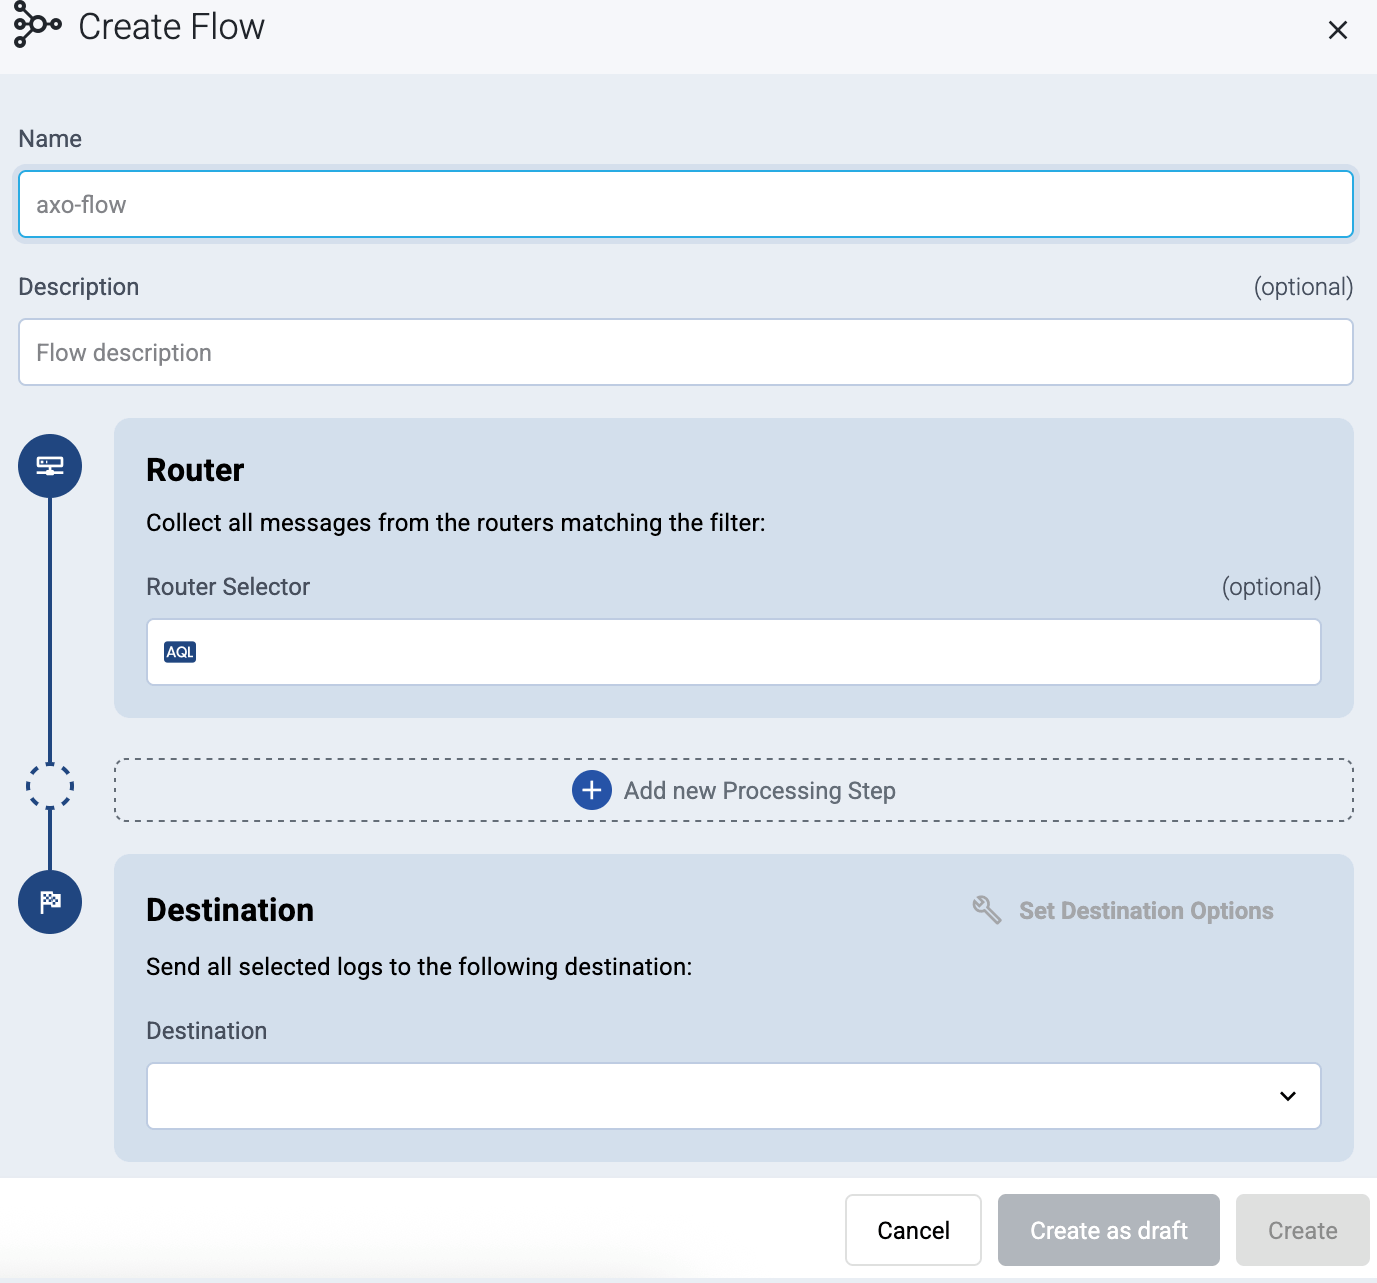
-
In the Router Selector field, enter an expression that matches the router(s) you want to apply the flow. To select a specific router, use a name selector, for example,
name = my-axorouter-hostname. -
Select the Destination where you want to send your data. If you don’t have any destination configured, see Destinations.
By default, you can select only external destinations. If you want to send data to another AxoRouter, enable the Show all destinations option, and select the connector of the AxoRouter where you want to send the data.

-
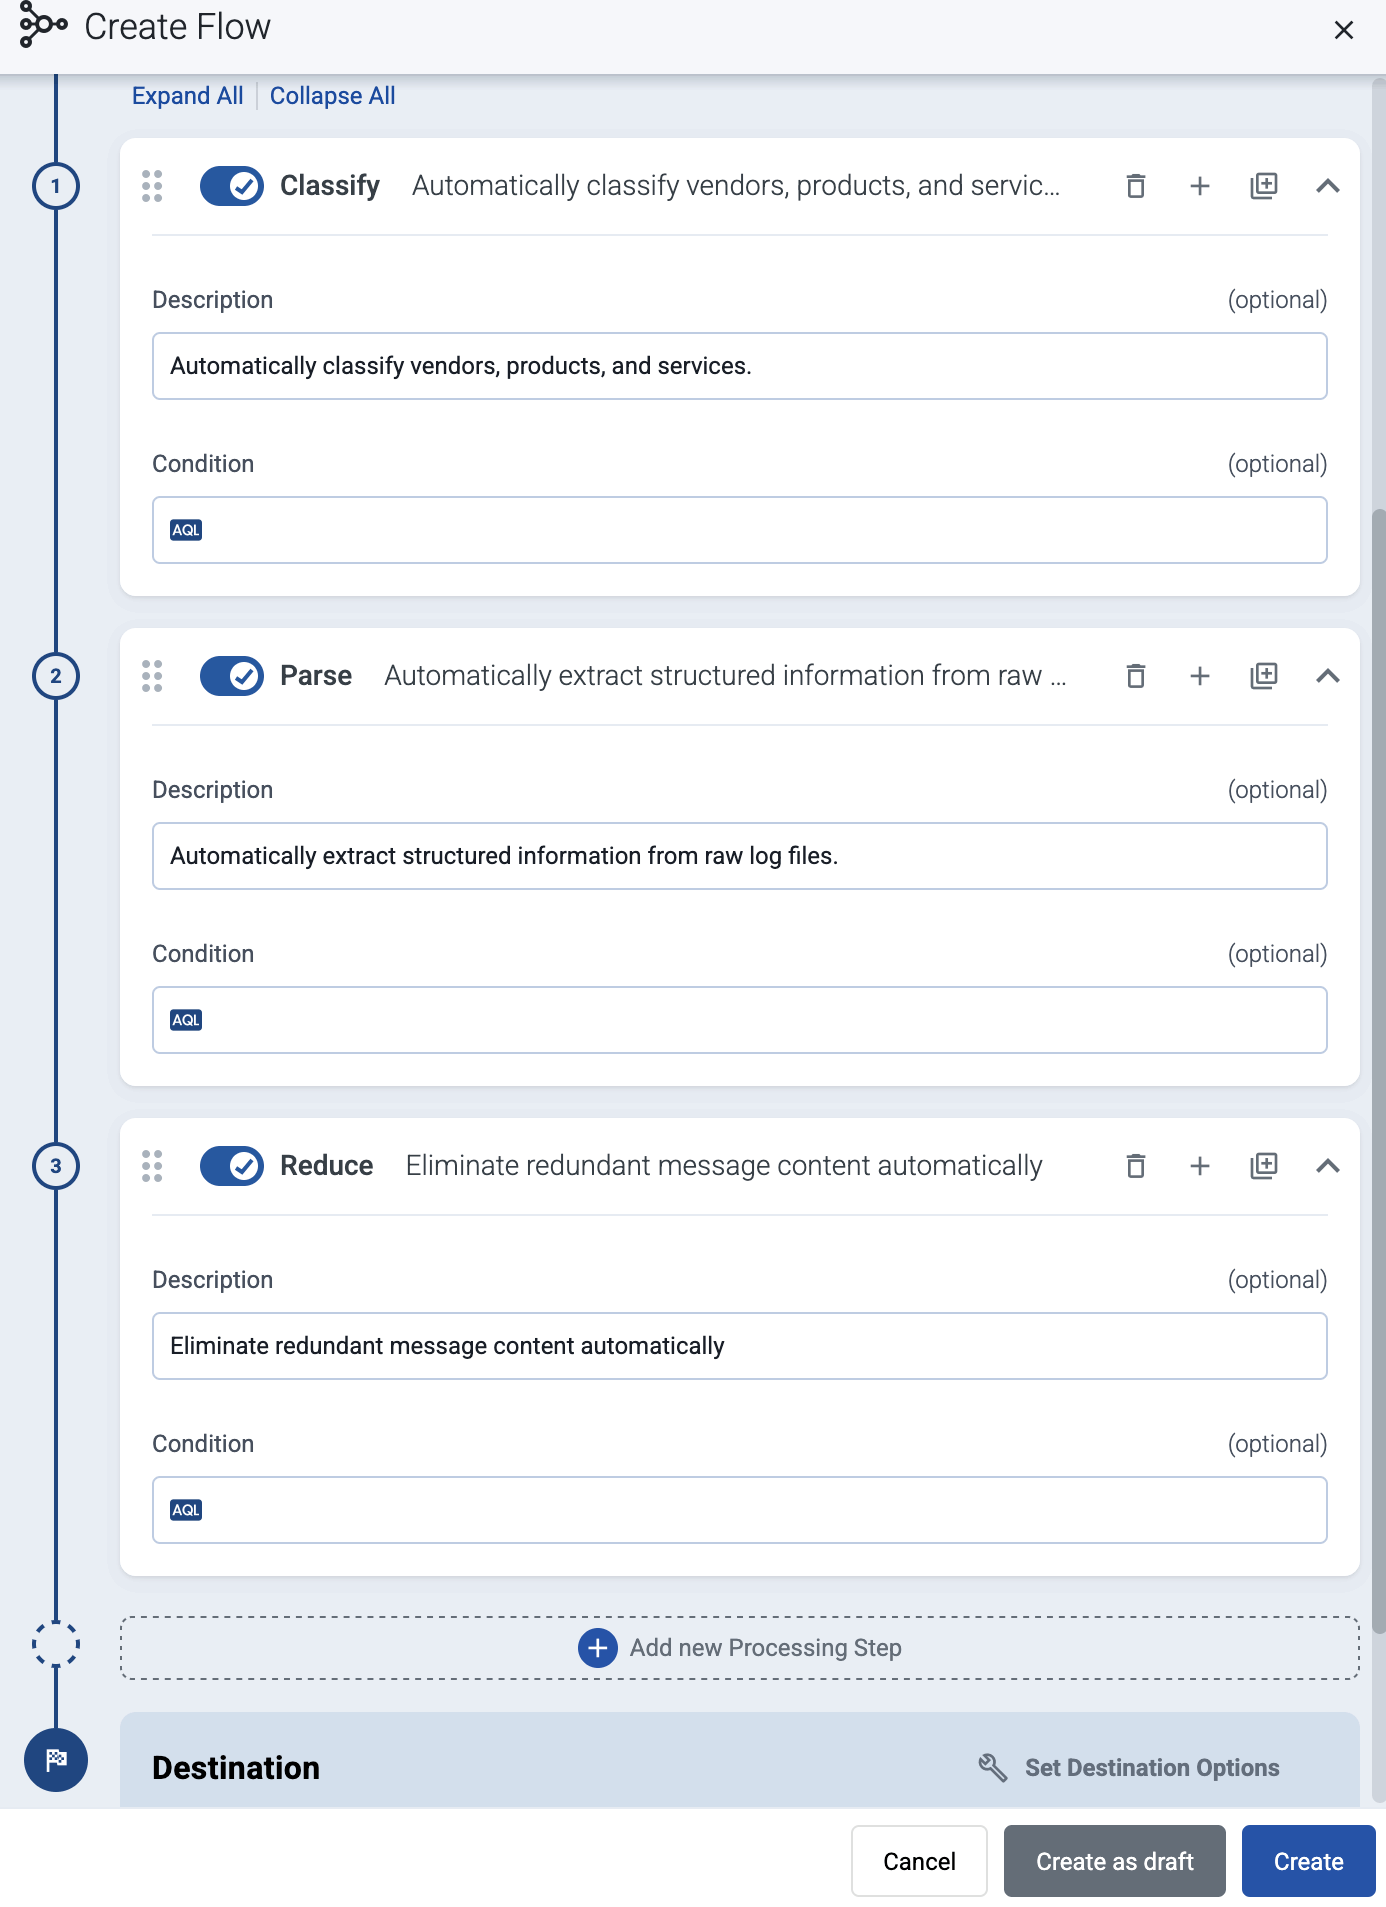
(Optional) To process the data transferred in the flow, select Add New Processing Step. For details, see Processing steps. For example:
- Add a Reduce step to automatically remove redundant and empty fields from your data.
- To select which messages are processed by the flow, add a Select Messages step, and enter a filter into the Query field. For example, to select only the messages received from Fortinet FortiGate firewalls, use the
meta.vendor = fortinet + meta.product = fortigatequery. - Save the processing steps.
-
Select Create.
-
The new flow appears in the Flows list.

-