# Sending Kubernetes logs to OpenSearch
The following tutorial shows you how to install AxoSyslog on Kubernetes, deploy OpenSearch to the same cluster, and send Kubernetes logs to OpenSearch.
## Prerequisites
You need:
* A Kubernetes cluster. We used [minikube]() with docker driver and Helm. We used a Ubuntu 22.04 (amd64) machine, but it should work on any system that can run minikube (2 CPUs, 2GB of free memory, 20GB of free disk space).
The OpenSearch service needs a large mmap count setting, so set it to at least 262144, for example:
```
sysctl -w vm.max_map_count=262144
```
* [Helm]() and [kubectl]() installed.
## Generate logs
If you don’t already have an application that generates logs deployed to the Kubernetes cluster, install `kube-logging/log-generator` to generate sample logs. Complete the following steps.
1. Add the `kube-logging` repository to Helm.
```
helm repo add kube-logging https://kube-logging.github.io/helm-charts
```
Expected output:
```
"kube-logging" has been added to your repositories
```
2. Update your repositories.
```
helm repo update
```
The output should look like:
```
Hang tight while we grab the latest from your chart repositories...
...Successfully got an update from the "kube-logging" chart repository
Update Complete. ⎈Happy Helming!⎈
```
3. Install `kube-logging/log-generator`.
```
helm install --generate-name --wait kube-logging/log-generator
```
The output should look like:
```
NAME: log-generator-1684694629
LAST DEPLOYED: Sun May 21 20:43:49 2023
NAMESPACE: default
STATUS: deployed
REVISION: 1
TEST SUITE: None
```
4. Check that the `log-generator` is running:
```
kubectl get pods
```
The output should look like:
```
NAME READY STATUS RESTARTS AGE
log-generator-1681984863-5946c559b9-ftrrn 1/1 Running 0 8s
```
## Set up OpenSearch
1. Install an OpenSearch cluster with Helm:
```
helm repo add opensearch https://opensearch-project.github.io/helm-charts/
```
Expected output:
```
"opensearch" has been added to your repositories
```
2. Update your repositories.
```
helm repo update
```
The output should look like:
```
Hang tight while we grab the latest from your chart repositories...
...Successfully got an update from the "opensearch" chart repository
Update Complete. ⎈Happy Helming!⎈
```
3. Install OpenSearch. This step can take a few minutes.
```
helm install --generate-name --wait opensearch/opensearch
```
4. Install the OpenSearch dashboards.
```
helm install --generate-name --wait opensearch/opensearch-dashboards
```
The output should look like:
```
NAME: opensearch-dashboards-1684695728
LAST DEPLOYED: Sun May 21 21:02:09 2023
NAMESPACE: default
STATUS: deployed
REVISION: 1
TEST SUITE: None
NOTES:
1. Get the application URL by running these commands:
export POD_NAME=$(kubectl get pods --namespace default -l "app.kubernetes.io/name=opensearch-dashboards,app.kubernetes.io/instance=opensearch-dashboards-1684695728" -o jsonpath="{.items[0].metadata.name}")
export CONTAINER_PORT=$(kubectl get pod --namespace default $POD_NAME -o jsonpath="{.spec.containers[0].ports[0].containerPort}")
echo "Visit http://127.0.0.1:8080 to use your application"
kubectl --namespace default port-forward $POD_NAME 8080:$CONTAINER_PORT
```
5. Now you should have 5 pods. Check that they exist:
```
kubectl get pods
```
The output should look like:
```
NAME READY STATUS RESTARTS AGE
log-generator-1681984863-5946c559b9-ftrrn 1/1 Running 0 3m39s
opensearch-cluster-master-0 1/1 Running 0 81s
opensearch-cluster-master-1 1/1 Running 0 81s
opensearch-cluster-master-2 1/1 Running 0 81s
opensearch-dashboards-1681999620-59f64f98f7-bjwwh 1/1 Running 0 44s
```
6. Forward the 5601 port of the OpenSearch Dashboards service (replace the name of the pod with your pod).
```
kubectl port-forward 8080:5601
```
The output should look like:
```
Forwarding from 127.0.0.1:8080 -> 5601
Forwarding from [::1]:8080 -> 5601
```
7. Log in to the dashboard at `http://localhost:8080` with admin/admin. You will soon create an Index Pattern here, but first you have to send some logs from `syslog-ng`.
## Set up axosyslog-collector
1. Add the AxoSyslog Helm repository:
```
helm repo add axosyslog https://axoflow.github.io/axosyslog-charts
helm repo update
```
2. Create a YAML file (called `axoflow-demo.yaml` in the examples) to configure the collector.
```
config:
sources:
kubernetes:
# Collect kubernetes logs
enabled: true
destinations:
# Send logs to OpenSearch
opensearch:
- address: "opensearch-cluster-master"
index: "test-axoflow-index"
user: "admin"
password: "admin"
tls:
# Do not validate the server's TLS certificate.
peerVerify: false
# Send the syslog fields + the metadata from .k8s.* in JSON format
template: "$(format-json --scope rfc5424 --exclude DATE --key ISODATE @timestamp=${ISODATE} k8s=$(format-json .k8s.* --shift-levels 2 --exclude .k8s.log))"
```
3. Check how the `syslog-ng.conf` file looks with your custom values:
```
helm template -f axoflow-demo.yaml -s templates/config.yaml axosyslog/axosyslog-collector
```
The output should look like:
```
# Source: axosyslog-collector/templates/config.yaml
apiVersion: v1
kind: ConfigMap
metadata:
labels:
helm.sh/chart: axosyslog-collector-0.3.0
app.kubernetes.io/name: axosyslog-collector
app.kubernetes.io/instance: release-name
app.kubernetes.io/version: "4.2.0"
app.kubernetes.io/managed-by: Helm
name: release-name-axosyslog-collector
data:
syslog-ng.conf: |
@version: current
@include "scl.conf"
options {
stats(
level(1)
);
};
log {
source { kubernetes(); };
destination {
elasticsearch-http(
url("https://opensearch-cluster-master:9200/_bulk")
index("test-axoflow-index")
type("")
template("$(format-json --scope rfc5424 --exclude DATE --key ISODATE @timestamp=${ISODATE} k8s=$(format-json .k8s.* --shift-levels 2 --exclude .k8s.log))")
user("admin")
password("admin")
tls(
peer-verify(no)
)
);
};
};
```
4. Install the `axosyslog-collector` chart:
```
helm install --generate-name --wait -f axoflow-demo.yaml axosyslog/axosyslog-collector
```
The output should look like:
```
NAME: axosyslog-collector-1682002179
LAST DEPLOYED: Thu Apr 20 16:49:39 2023
NAMESPACE: default
STATUS: deployed
REVISION: 1
TEST SUITE: None
NOTES:
1. Watch the axosyslog-collector-1682002179 container start.
```
5. Check your pods:
```
kubectl get pods --namespace=default -l app=axosyslog-collector-1682002179 -w
kubectl get pods
```
The output should look like:
```
NAME READY STATUS RESTARTS AGE
log-generator-1681984863-5946c559b9-ftrrn 1/1 Running 0 13m
opensearch-cluster-master-0 1/1 Running 0 11m
opensearch-cluster-master-1 1/1 Running 0 11m
opensearch-cluster-master-2 1/1 Running 0 11m
opensearch-dashboards-1681999620-59f64f98f7-bjwwh 1/1 Running 0 10m
axosyslog-collector-1682002179-pjlkn 1/1 Running 0 6s
```
## Check the logs in OpenSearch
1. Open OpenSearch dashboard at `http://localhost:8080/app/management/opensearch-dashboards/`.
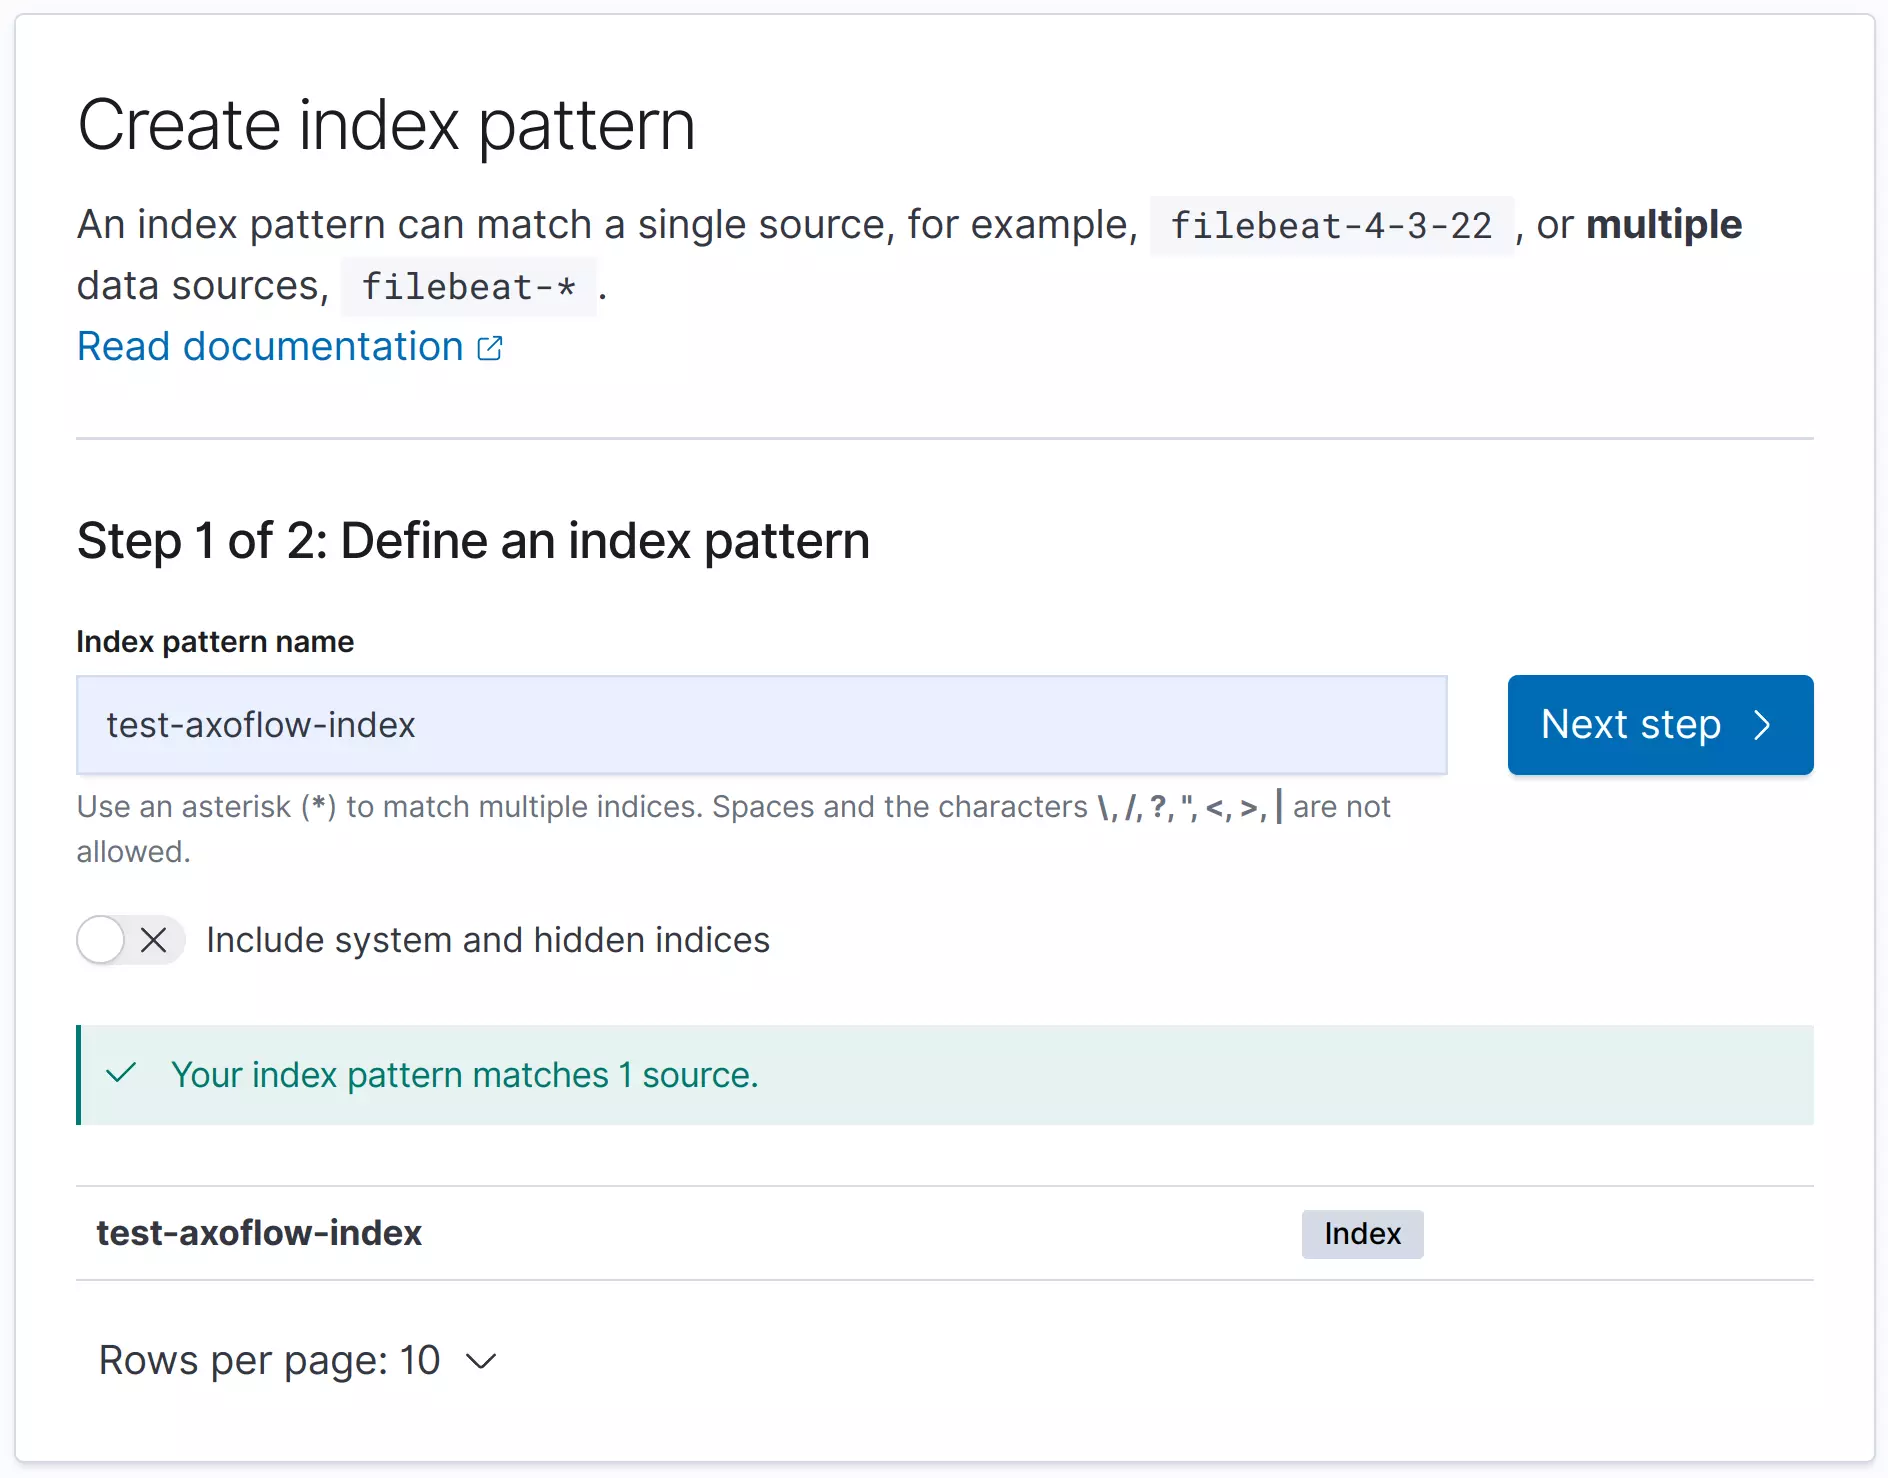
2. Create an Index Pattern called `test-axoflow-index`: `http://localhost:8080/app/management/opensearch-dashboards/indexPatterns`. At Step 2, set the **Time** field to `@timestamp`.
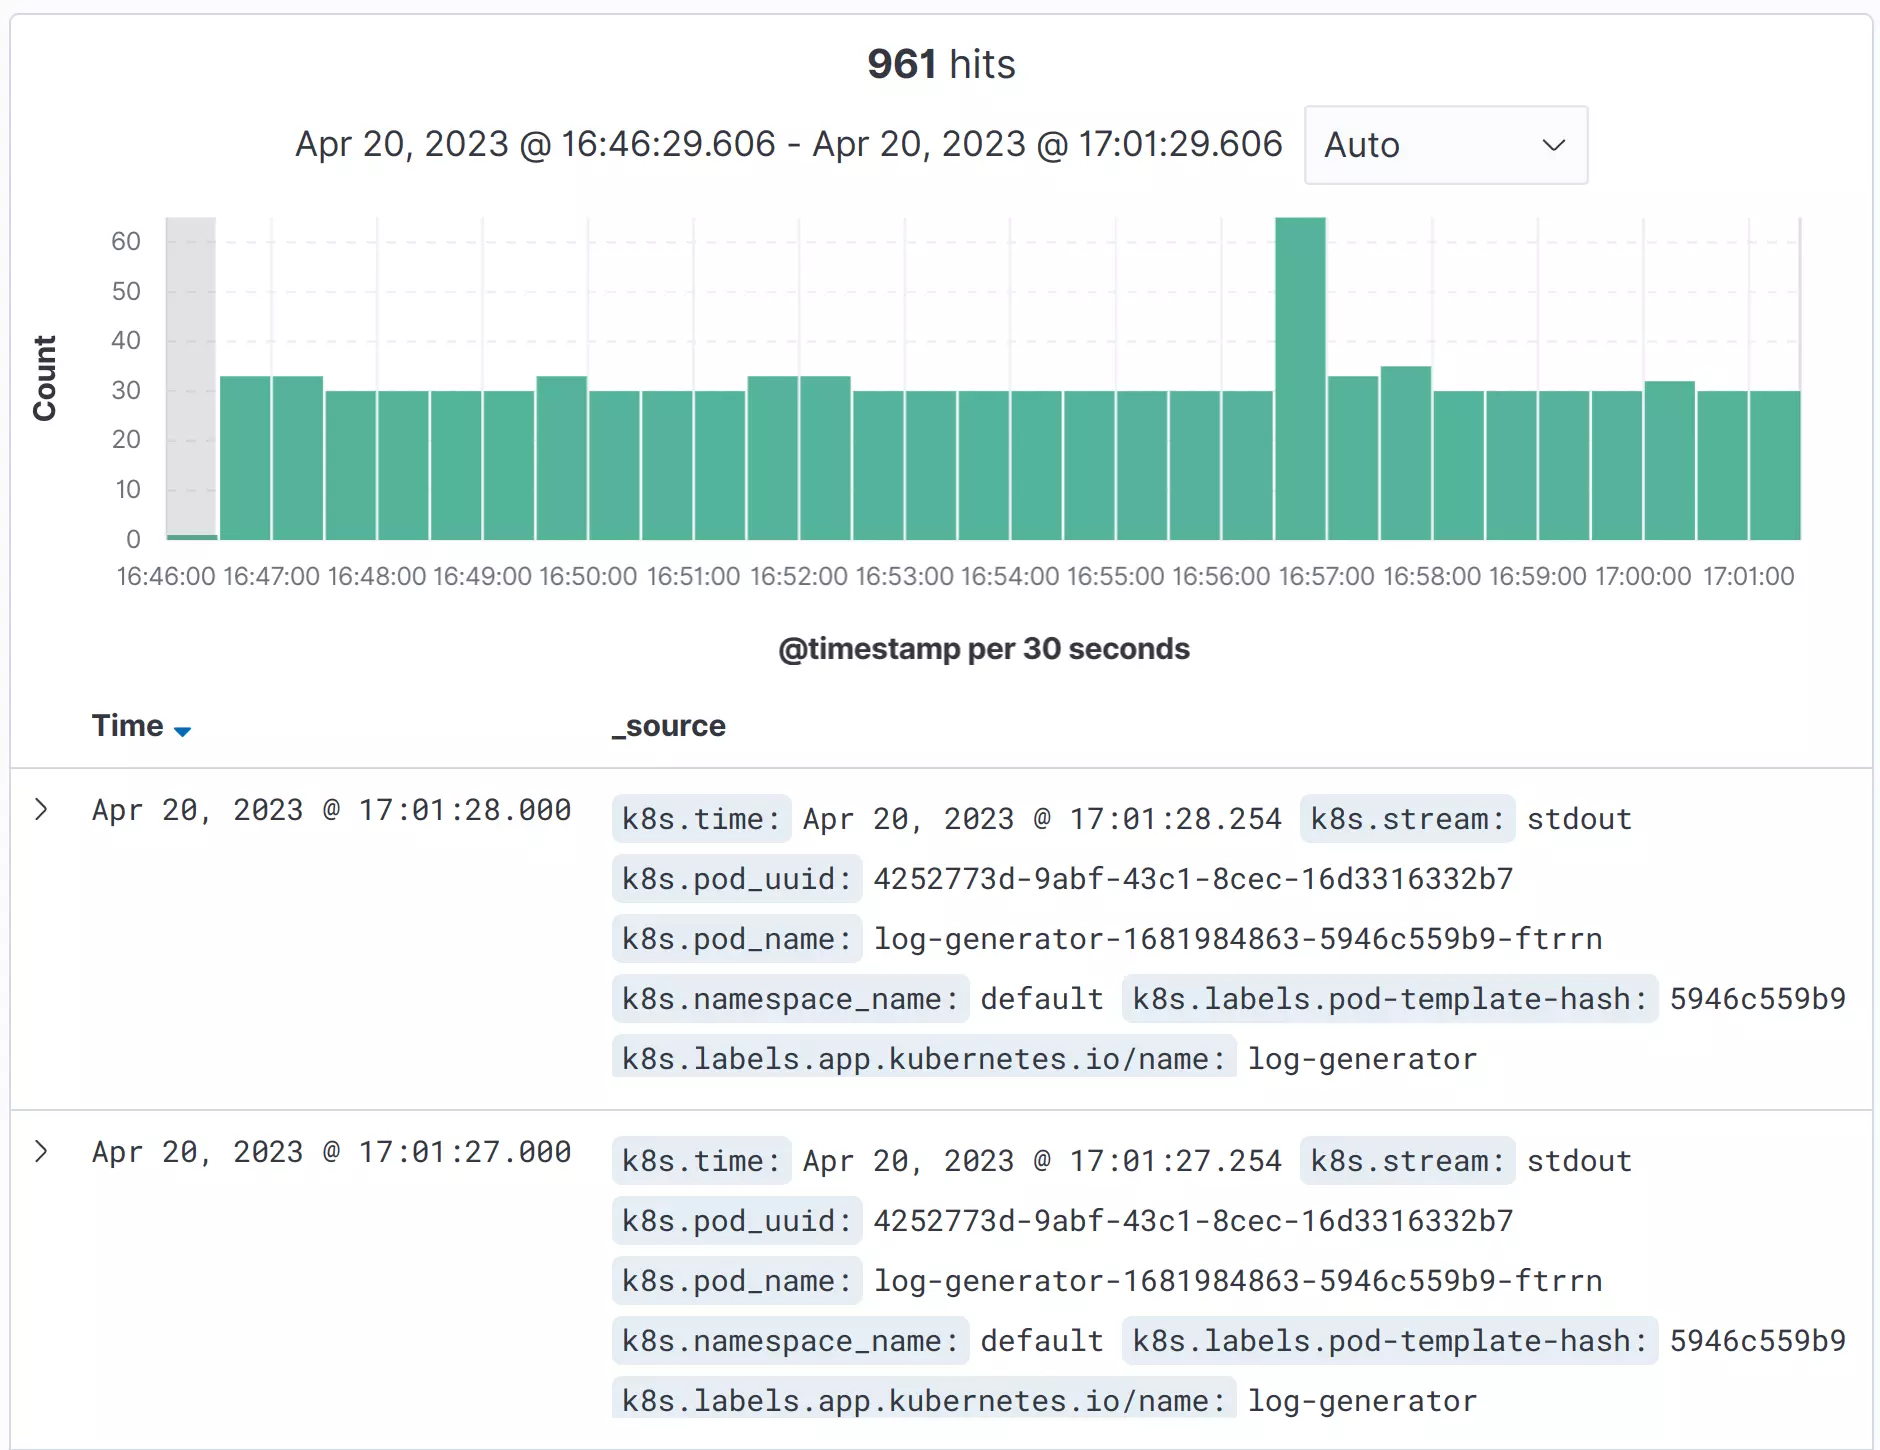
3. Now you can see your logs on the Discover view at `http://localhost:8080/app/discover`. Opening the detailed view for a log entry shows you the fields sent to OpenSearch.
Last modified June 10, 2024: [Leftover tagline updates (8047632)]()